
Training a Model
The Model Builder generates a training workflow from a form and commits it to your repository. When the push lands, Gitea Actions triggers the workflow on your chosen runner and executes training. Artifacts are uploaded to the Actions run for you to download when training completes.
Use the Model Builder when you want to:
- Train a modulation recognition, signal classification, or other RF ML model on a curated dataset
- Fine-tune a pre-trained wireless foundation model (WavesFM) on your own data
- Run hyperparameter optimisation with Optuna across multiple training trials
What the workflow produces:
best.pt: the best PyTorch checkpoint by validation metricbest.onnx: ONNX export of the best model (if ONNX export is enabled)log.txt: JSONL training log with per-epoch metrics- Optionally:
confusion_matrix.png, parameter sweep plots
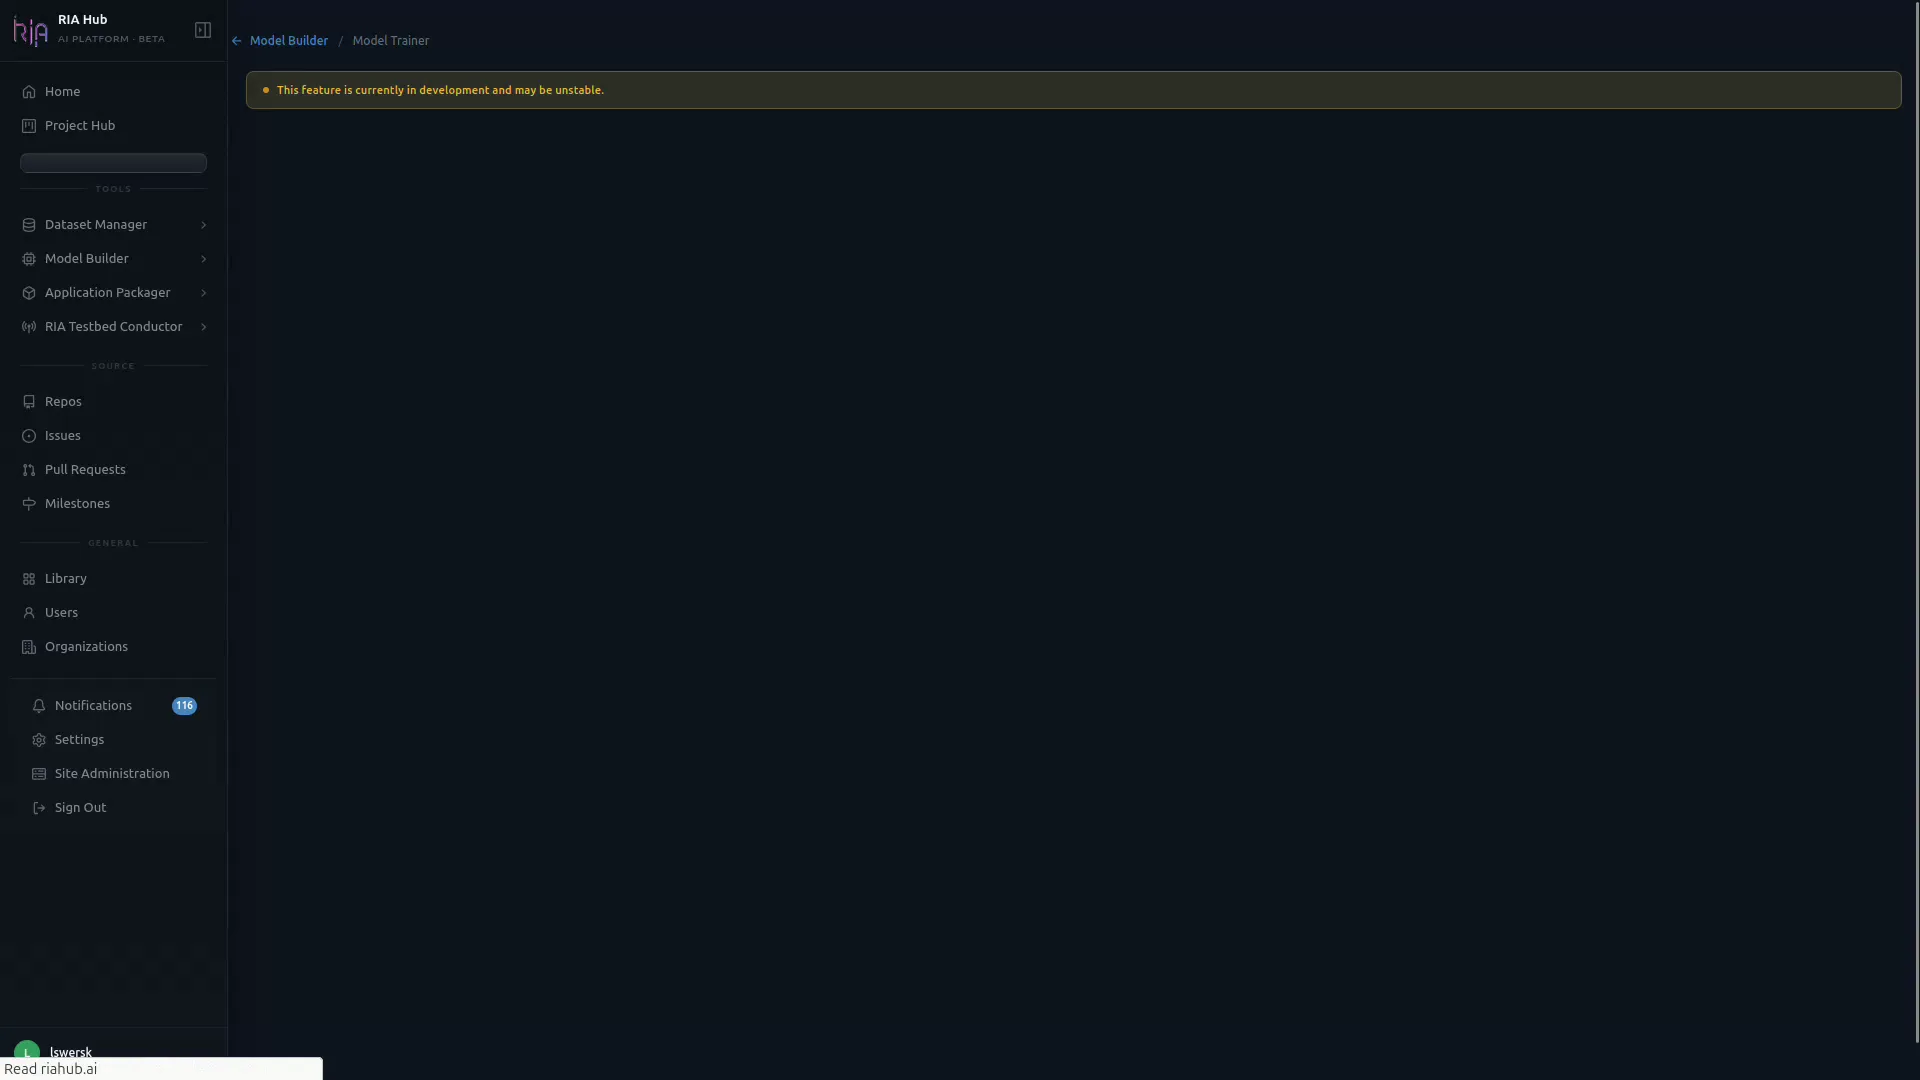
Heads-up: Model Builder is currently flagged as a beta feature. You will see a development notice at the top of the page during runs.
What you’ll need
Section titled “What you’ll need”- A curated
radio_datasetin your repository Library: see Curating a Dataset - At least one runner registered under Workflows → Management → Runners
RIAHUB_BASE_URLset as a repository variable or secret: set it tohttps://riahub.ai(or your instance URL) under Settings → Variables → Actions- Write access to the target repository where the workflow file and artifacts will be committed
Step 1: Open Model Builder
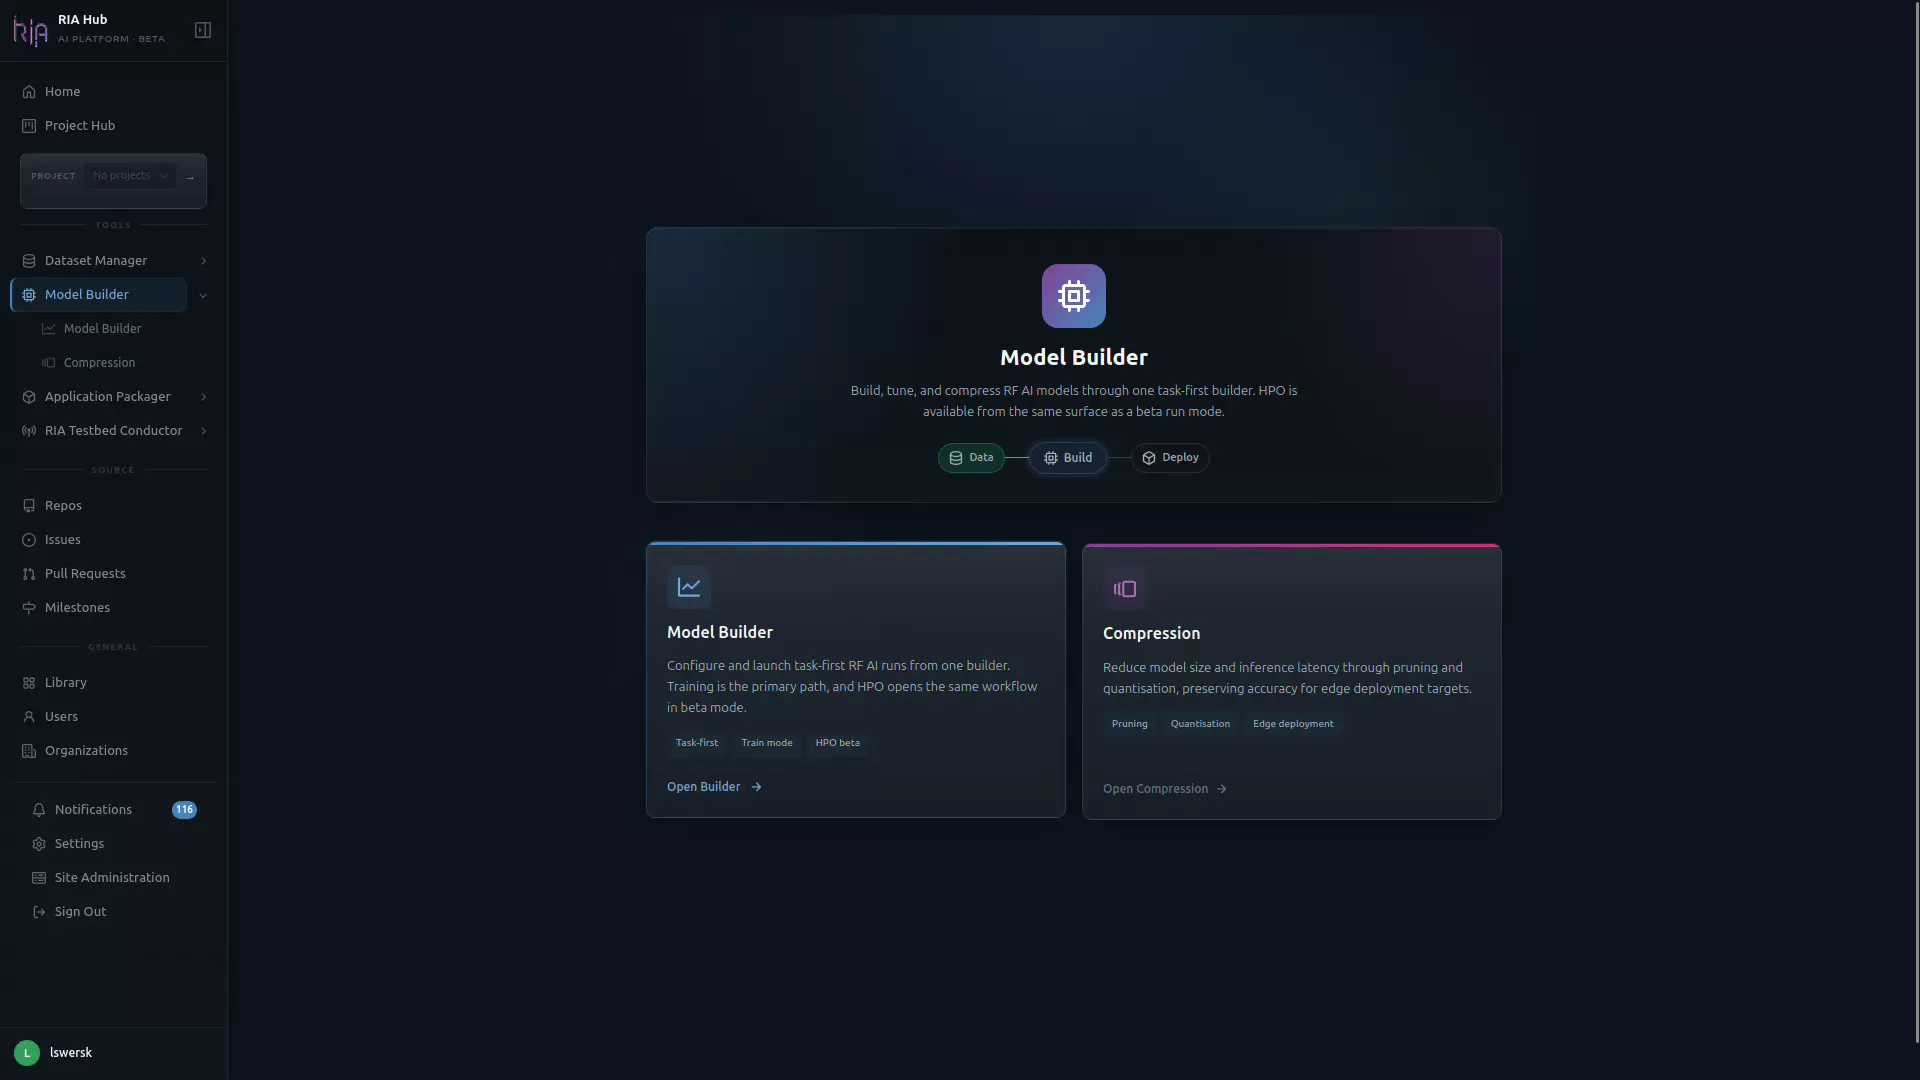
Section titled “Step 1: Open Model Builder”Navigate to your repository, then click Model Builder in the left sidebar. The overview page shows the two sub-tools:
- Model Builder: configure & launch training (Train mode or HPO beta).
- Compression: pruning and quantisation for edge deployment.
Click Open Builder on the Model Builder card, then select Model Trainer from the top navigation.
Step 2: Get oriented on the Model Trainer page
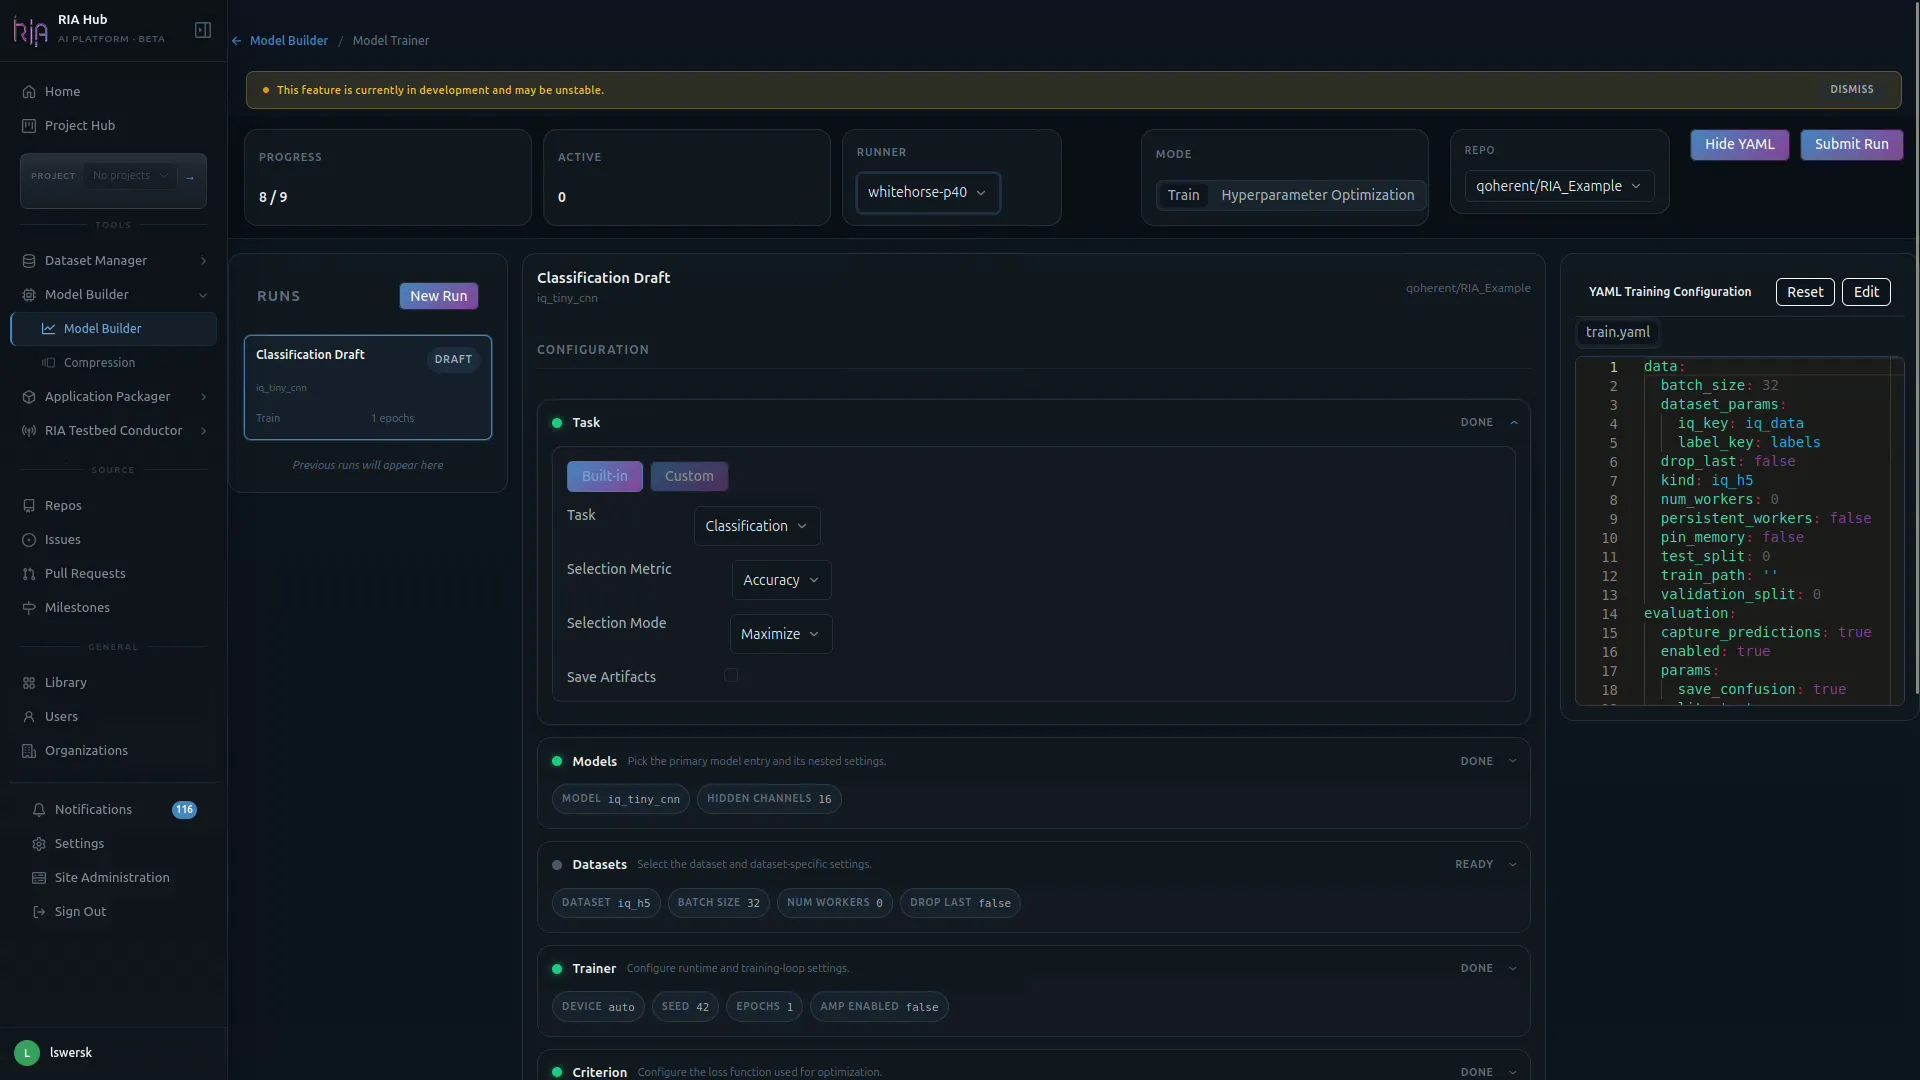
Section titled “Step 2: Get oriented on the Model Trainer page”The Model Trainer page loads with a pipeline header at the top, configuration cards in the middle, and a live YAML preview on the right.
The page header is your control bar:
| Field | What it controls |
|---|---|
| Progress | Configuration completeness (e.g. 8 / 9 sections done). |
| Active | Number of currently running jobs. |
| Runner | The Actions runner that will execute the training (e.g. dawson-gpu). |
| Mode | Train (default) or Hyperparameter Optimization (beta). |
| Repo | Target repository where the workflow YAML is committed. |
| Hide YAML / Submit Run | Toggles the live YAML preview and submits the configured run. |
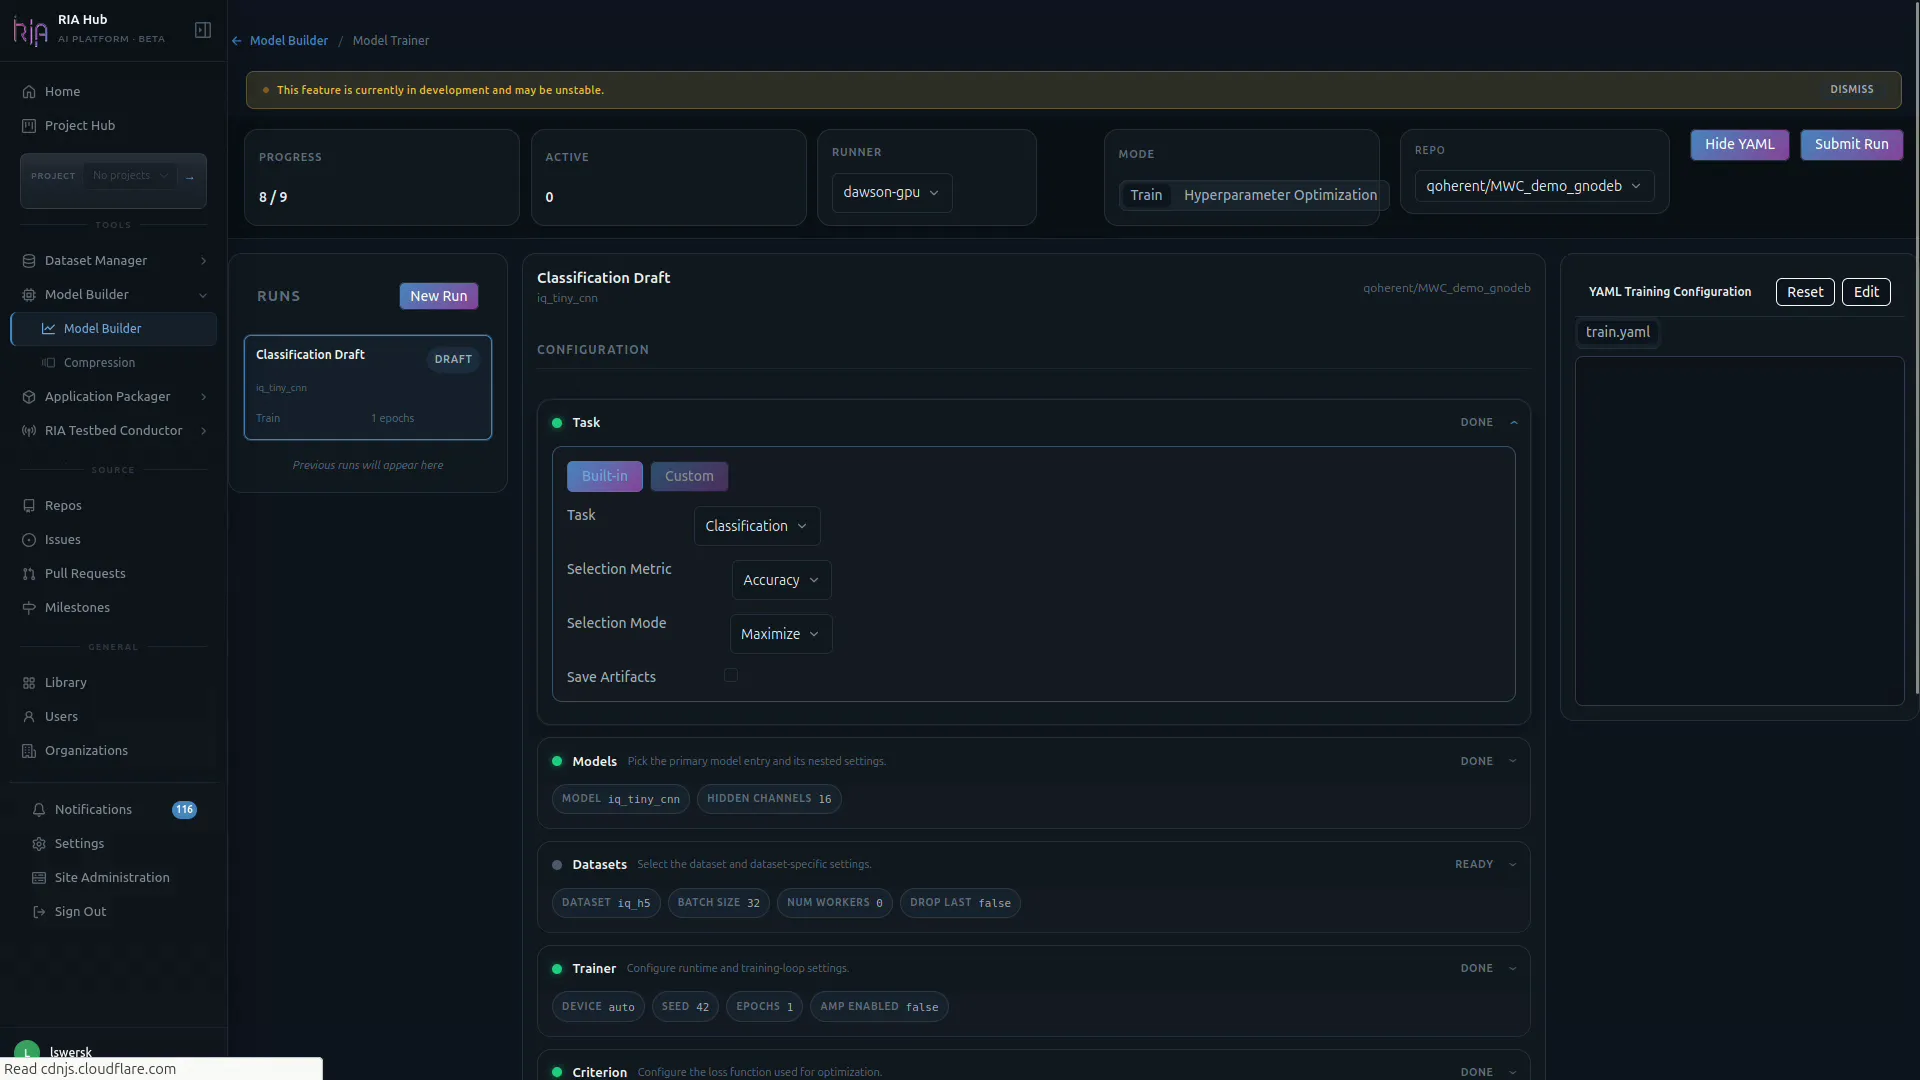
Each configuration card shows a status pill on the right (DONE, READY, ACTIVE) so you always know which parts of the run are configured.
Step 3: Pick a target repository
Section titled “Step 3: Pick a target repository”Click the Repo dropdown in the header and choose the repo that owns this training job. Only repositories you can push to are listed.
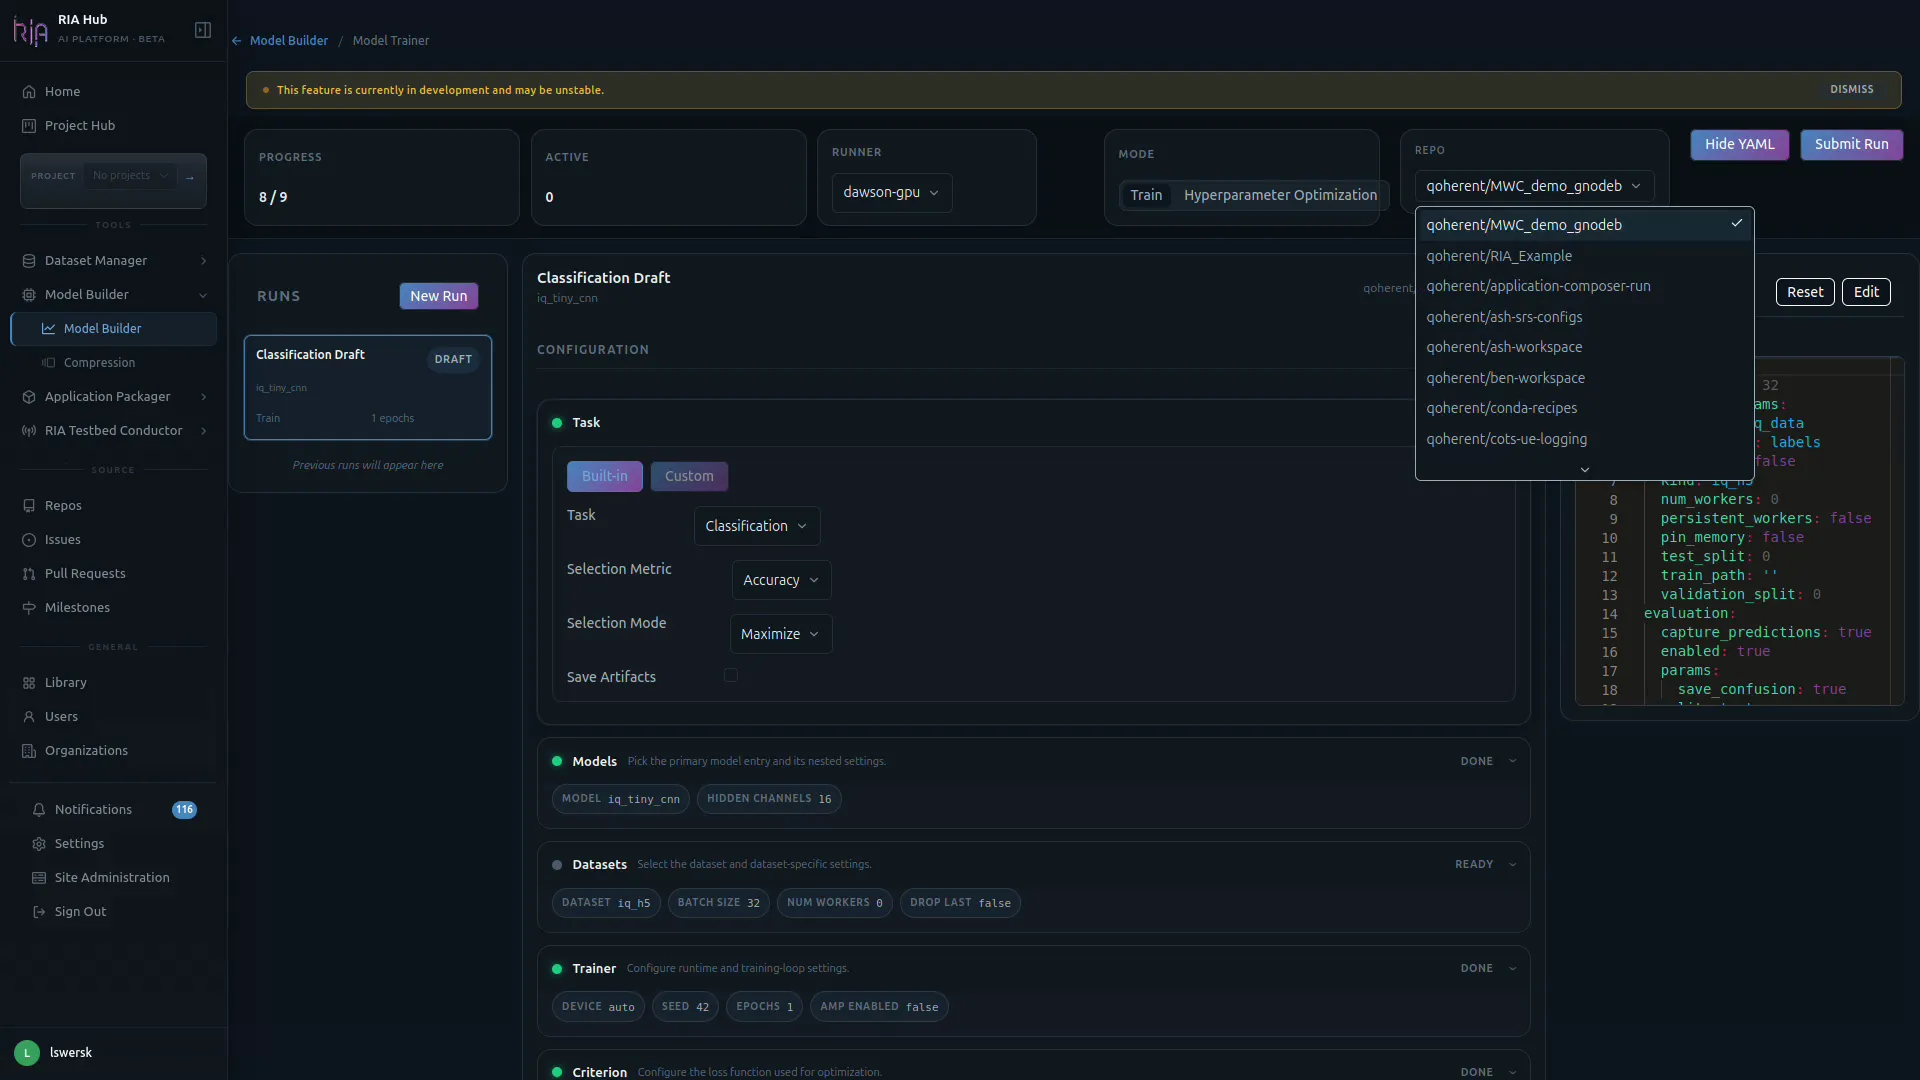
The selected repo determines:
- Where the
.riahub/workflows/train.yamlfile will be committed. - Which runners are available in the Runner dropdown.
Step 4: Configure the Task
Section titled “Step 4: Configure the Task”The Task section is the first card under CONFIGURATION. It controls what you are training a model to do.
- Toggle between Built-in and Custom tasks. Built-in covers common RF tasks (classification, detection, etc.); Custom lets you point at a
task.yamlmanifest in a connected repo. - Task: pick the task type, e.g.
Classification. - Selection Metric: the metric used to choose the best checkpoint (e.g.
Accuracy). - Selection Mode:
MaximizeorMinimizethe selection metric. - Save Artifacts: turn on to keep model checkpoints from the run.
Step 5: Choose a model template
Section titled “Step 5: Choose a model template”Expand the Models card and pick a template from the model picker. The right choice depends on your hardware and the complexity of the problem:
| Template | Typical use |
|---|---|
| MobileNetV3 | Good starting point: runs on a cpu runner, trains in 10–30 minutes on a small dataset |
| ResNet18 | Slightly higher capacity than MobileNetV3; use when accuracy matters more than speed |
| WavesFM Linear Probe | Fast WavesFM adaptation: train only the classification head; GPU runner recommended |
| WavesFM LoRA | Deeper WavesFM fine-tuning with low-rank weight matrices; GPU runner required |
For the modulation recognition tutorial, MobileNetV3 on a cpu runner is the right choice.
For each model you can override per-model hyperparameters surfaced by the manifest:
- MODEL: the model entry file (e.g.
iq_tiny_cnn). - HIDDEN CHANNELS: and any other model-specific knobs (e.g.
16).
WavesFM-specific parameters
Section titled “WavesFM-specific parameters”When a WavesFM template is selected, two additional fields appear:
| Parameter | Default | Notes |
|---|---|---|
| Task | rml | Must match a WavesFM-supported task name |
| LoRA rank | 32 | Lower values train faster; higher values adapt more |
| LoRA alpha | 64 | Scaling factor (alpha / sqrt(rank)); leave at 2 × rank |
Step 6: Select your dataset
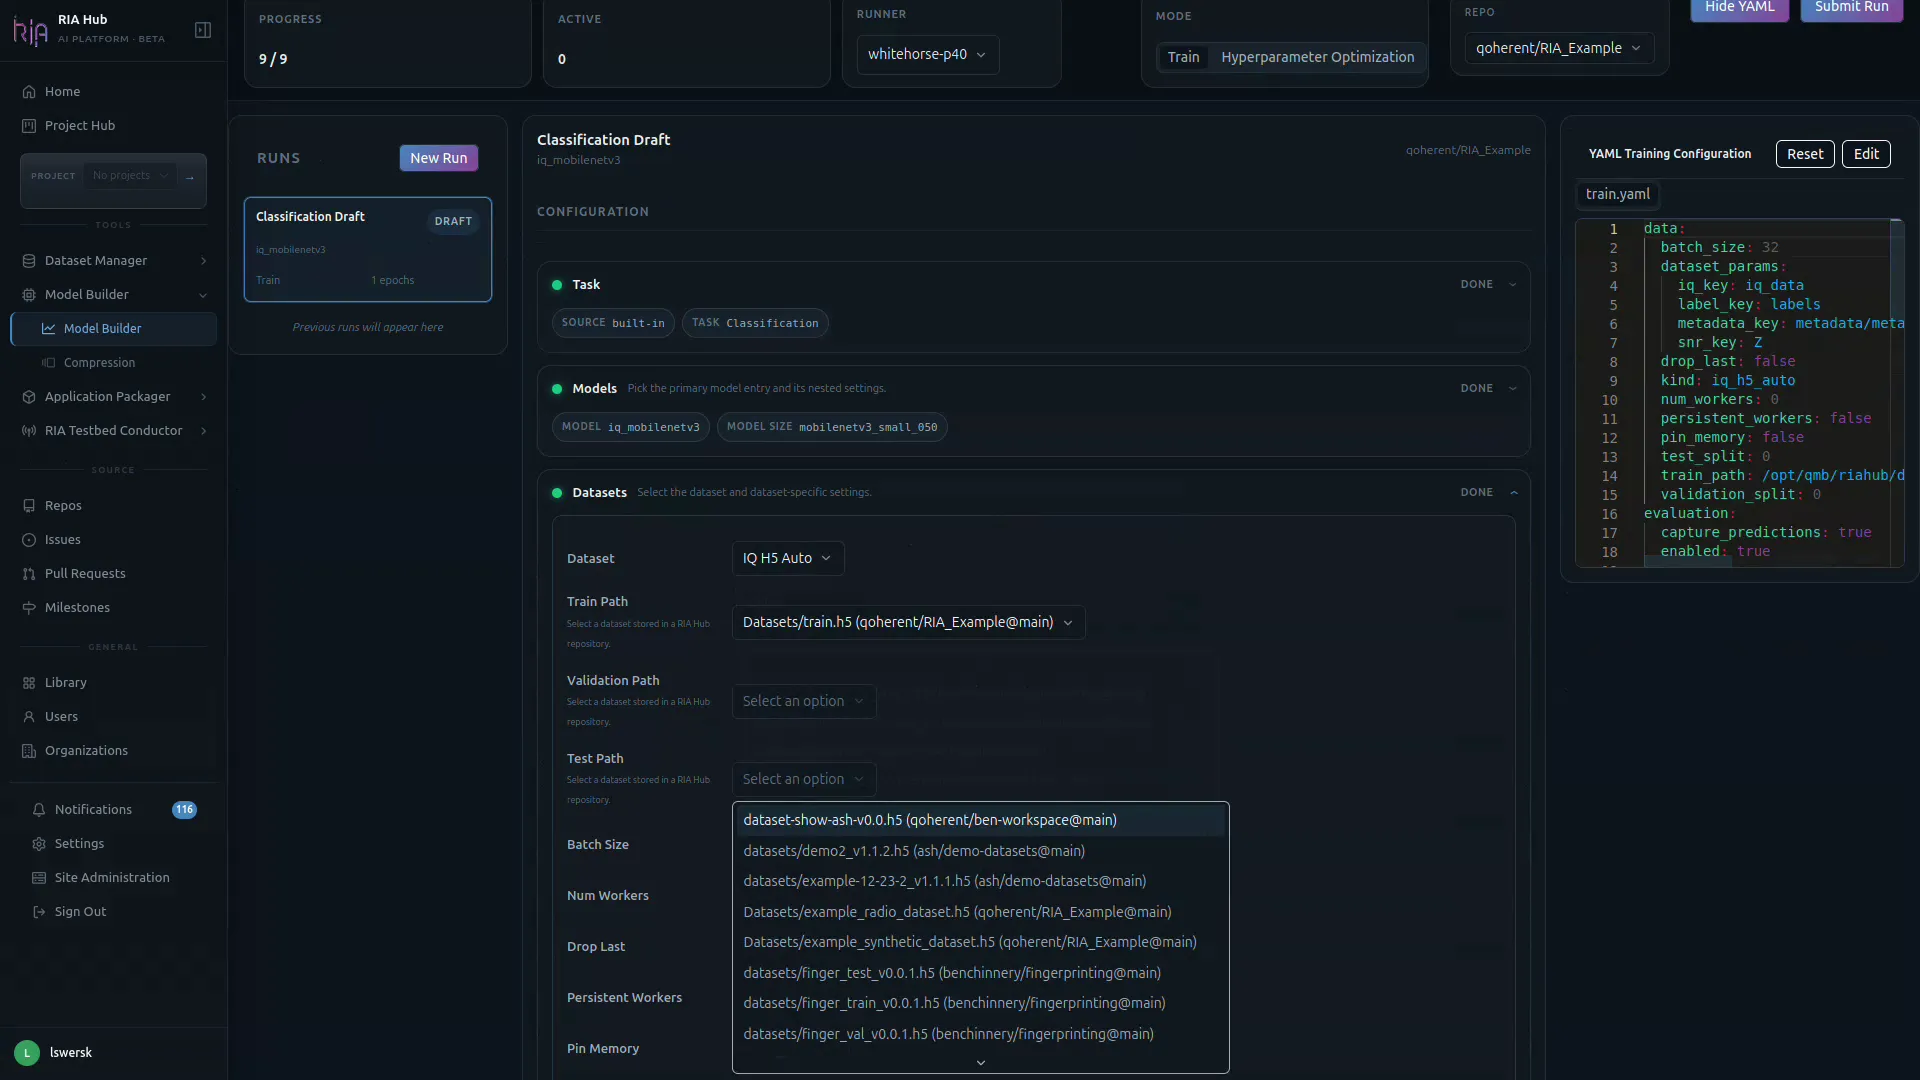
Section titled “Step 6: Select your dataset”Expand the Datasets card. This is where you wire the model to the data on disk.
You have two ways to attach a dataset:
- Browse Library: click and select a curated
radio_datasetfrom your repository Library. The builder reads the HDF5 attributes to detect the number of classes and the input shape. The OID (object identifier) of the selected dataset is written into the generated workflow’s download step so the runner can fetch it from MinIO. - Per-path file pickers: for Train Path, Validation Path, and Test Path, click the dropdown to browse
.h5dataset files in your repos (the path format isDatasets/<file>.h5 (owner/repo@branch)).
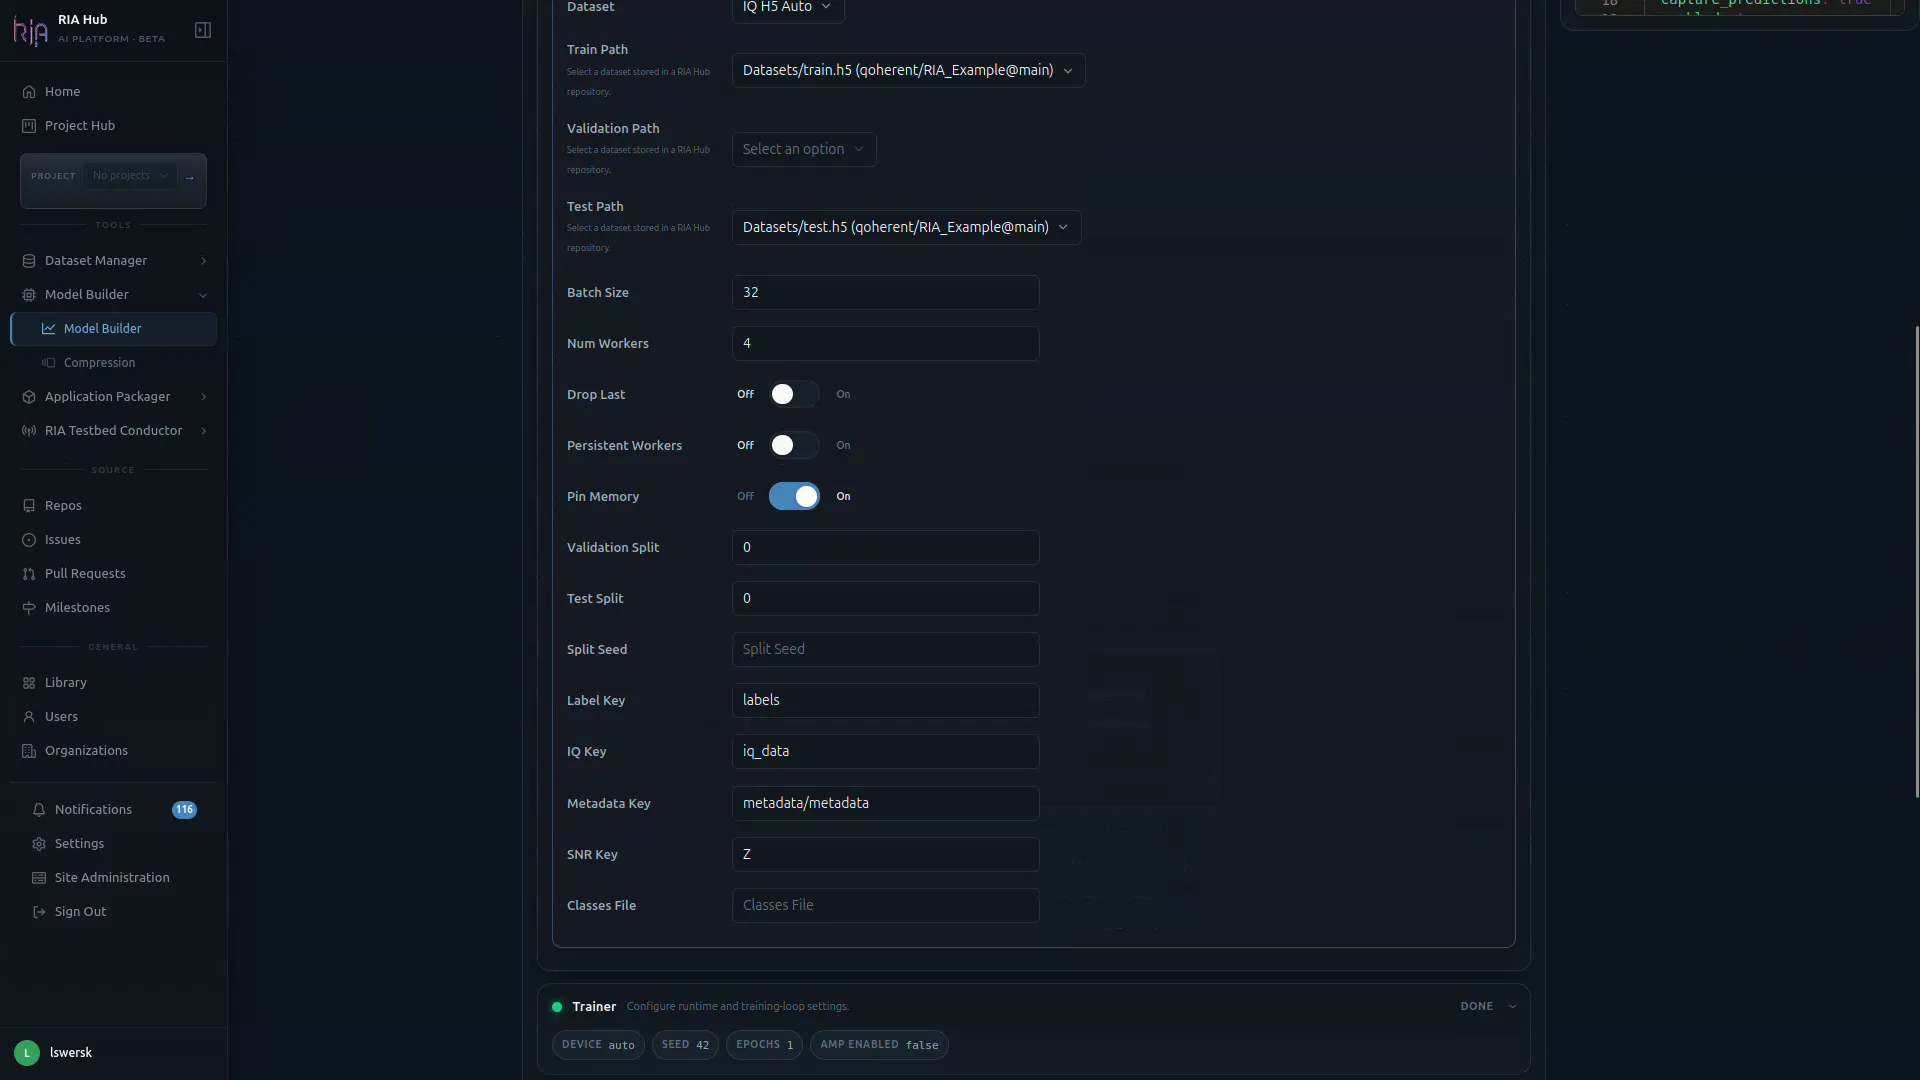
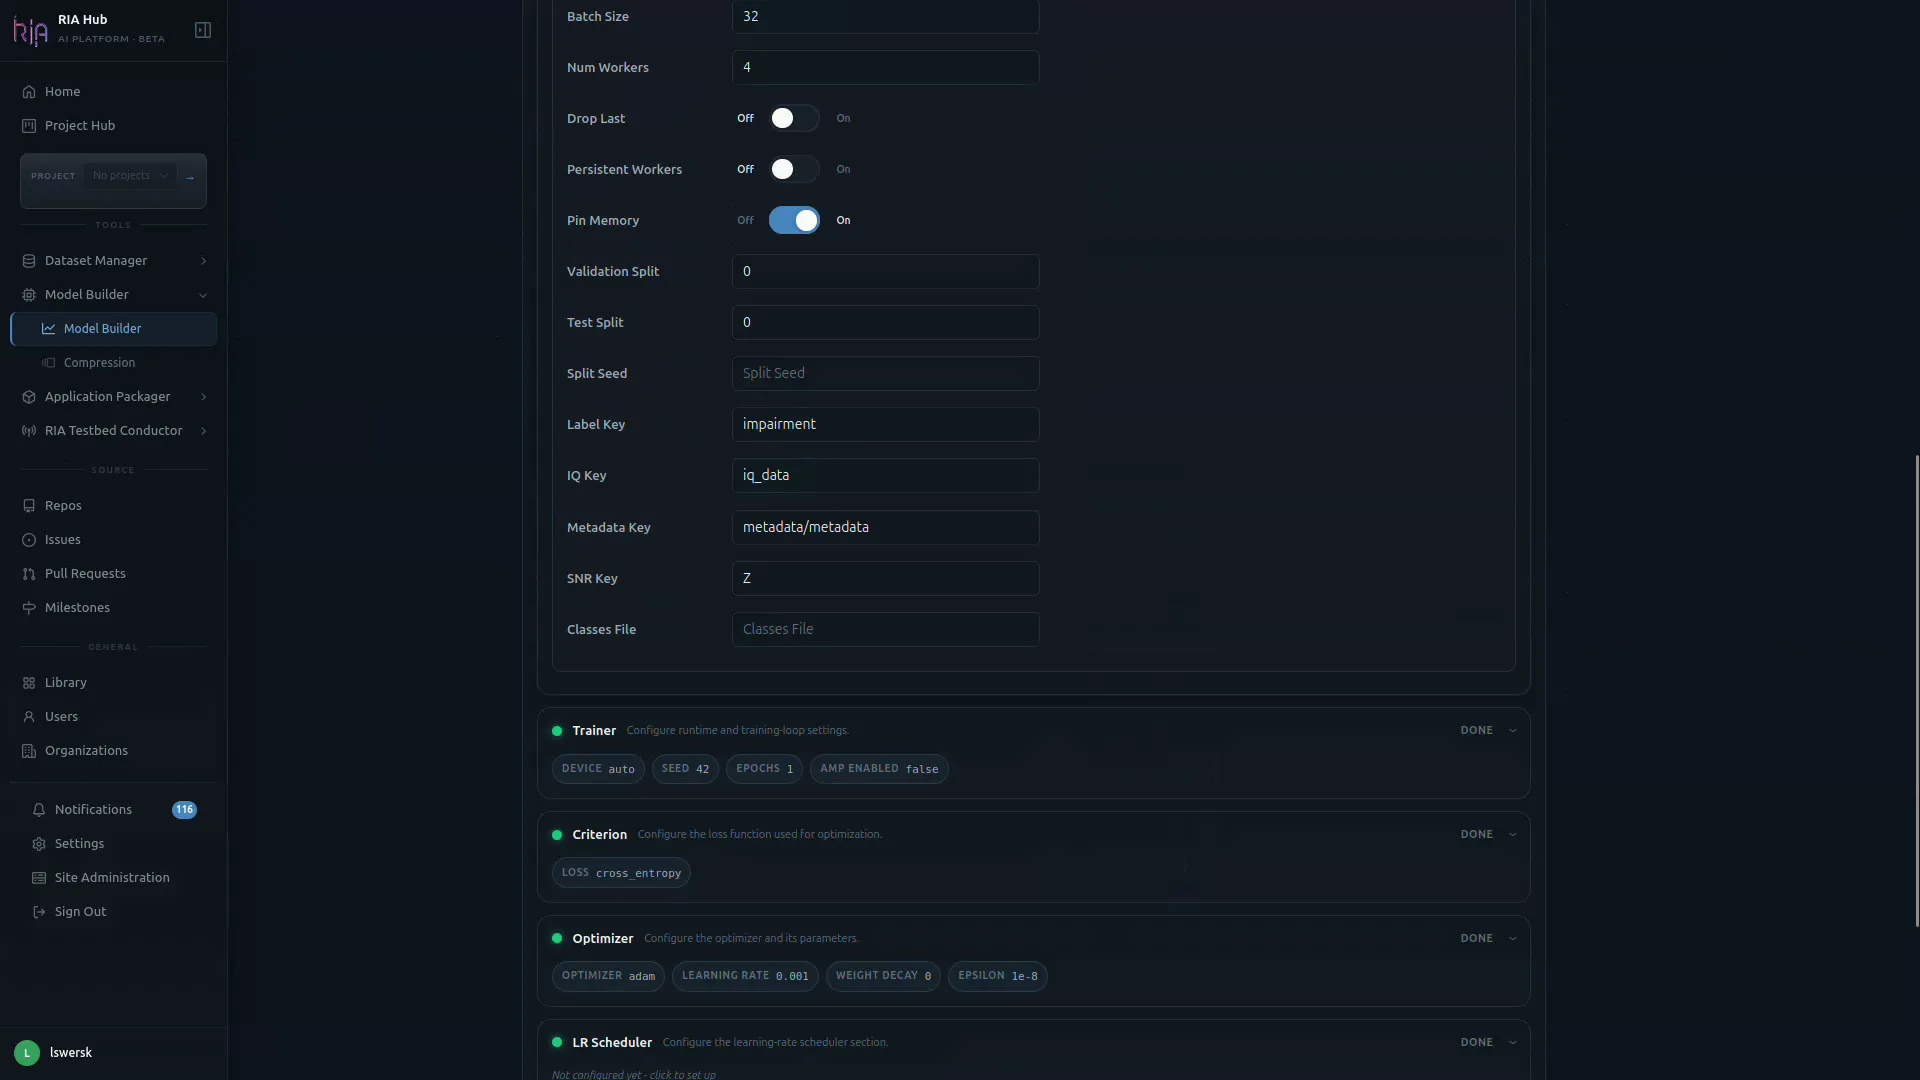
Below the paths are the loader-level controls:
| Field | Purpose |
|---|---|
| Batch Size | Samples per training step (default 32 in the UI; 256 for the modulation recognition tutorial defaults). |
| Num Workers | Parallel data-loader workers. |
| Drop Last / Persistent Workers / Pin Memory | Standard PyTorch DataLoader switches. |
| Validation Split / Test Split / Split Seed | Use these if you want the loader to create the splits instead of supplying separate files (defaults to 80 / 20 train / val). |
| Label Key / IQ Key / Metadata Key / SNR Key | Keys inside the .h5 file to read for labels, IQ samples, metadata and SNR. |
| Classes File | Optional file mapping class indices to names. |
Step 7: Configure training parameters
Section titled “Step 7: Configure training parameters”Sensible defaults are pre-filled across the remaining cards. Adjust only what you need.
High-level defaults
Section titled “High-level defaults”| Parameter | Default | Notes |
|---|---|---|
| Epochs | 20 | Increase to 30–50 for small datasets |
| Batch size | 256 | Reduce if the runner runs out of memory |
| Learning rate | 0.001 | Adam/AdamW default |
| Optimiser | AdamW | SGD, Adam, AdamW, RMSprop available |
| LR scheduler | CosineAnnealingLR | Smooth decay; suits short runs |
| Train / val split | 80 / 20 | |
| Evaluation metrics | accuracy, f1 | Add precision, recall, auroc as needed |
| Export ONNX | On | Recommended: required for edge deployment |
| Upload confusion matrix | Off | Enable to get a confusion matrix PNG in the artifacts |
Trainer card
Section titled “Trainer card”The Trainer card sets runtime and training-loop behaviour.
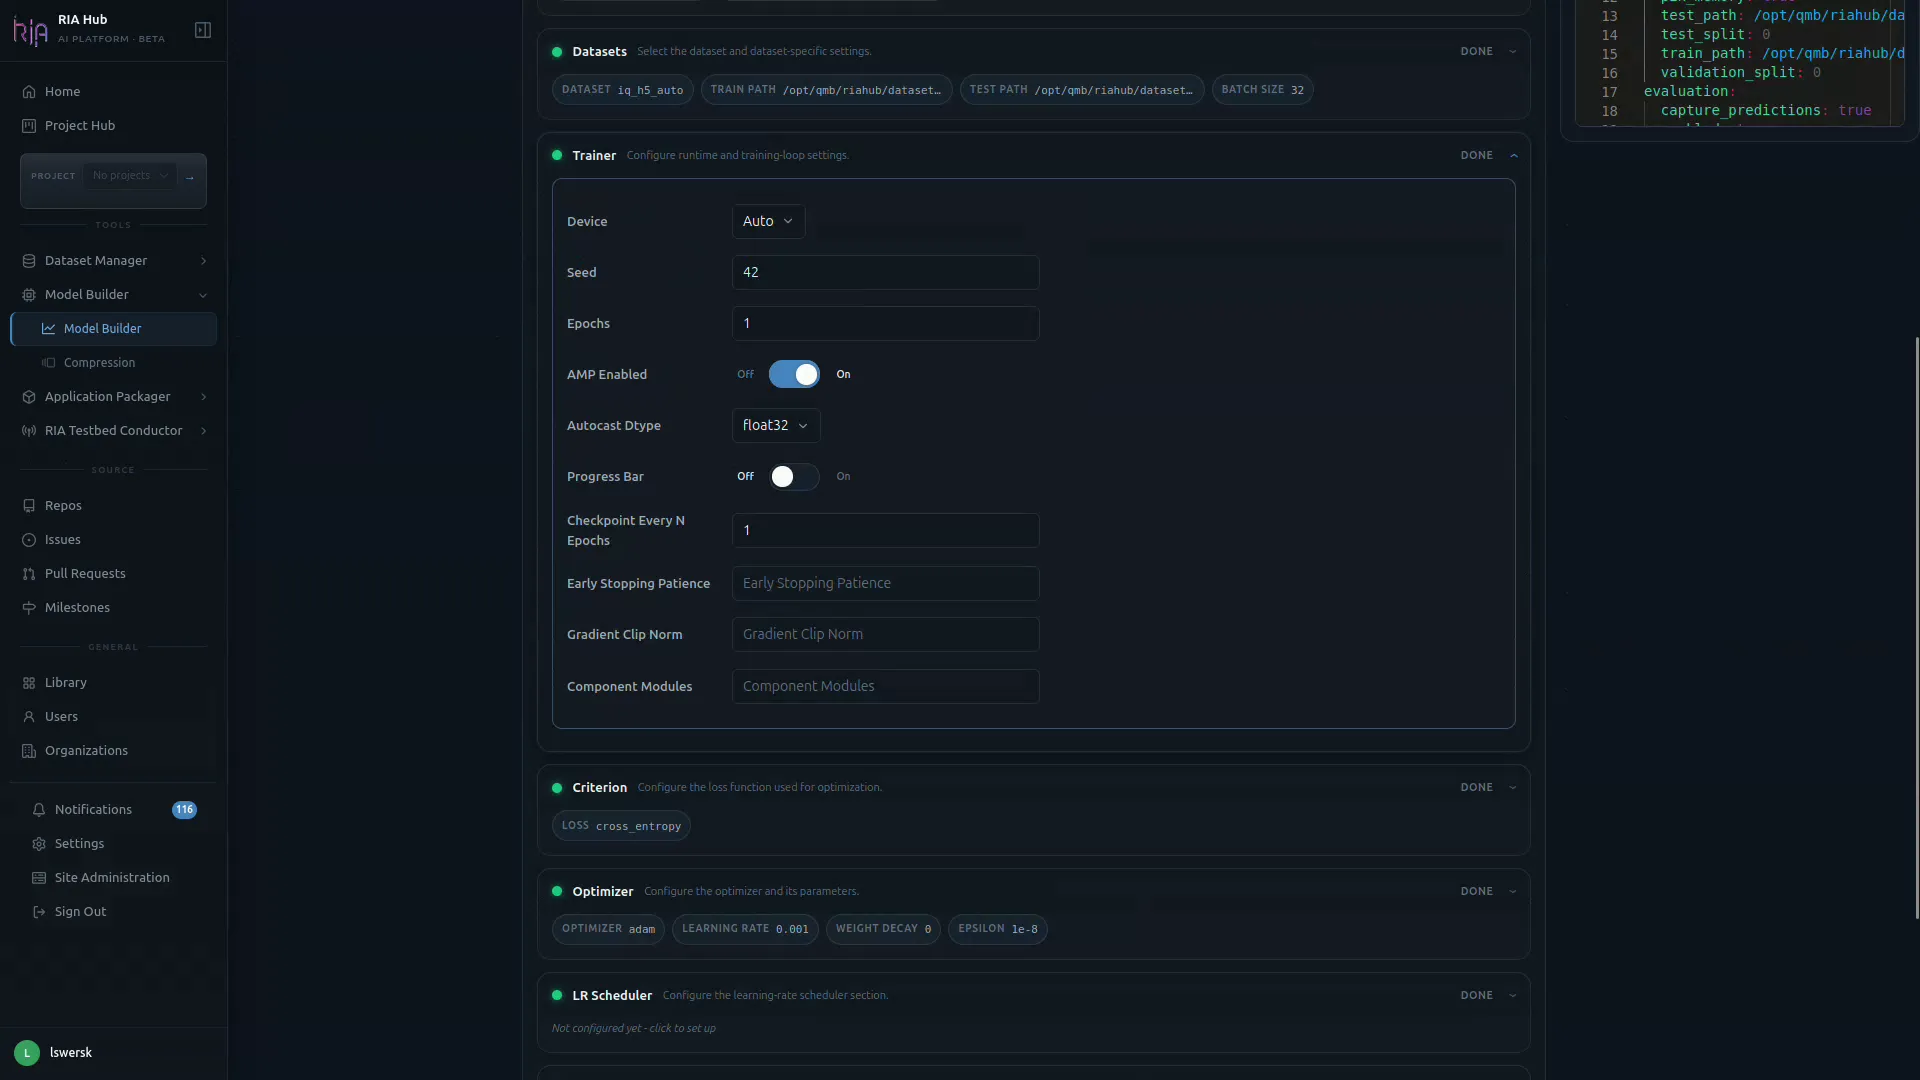
- Device:
Auto, CPU, or a specific GPU. - Seed: random seed for reproducibility (e.g.
42). - Epochs: number of training epochs.
- AMP Enabled: automatic mixed precision (on by default for GPU runs).
- Autocast Dtype:
float32,float16, orbfloat16. - Progress Bar, Checkpoint Every N Epochs, Early Stopping Patience, Gradient Clip Norm, Component Modules: optional fine-tuning controls.
Criterion, Optimizer, LR Scheduler, Evaluation, Export
Section titled “Criterion, Optimizer, LR Scheduler, Evaluation, Export”Each of the remaining cards controls one piece of the training recipe:
| Card | What to set |
|---|---|
| Criterion | Loss function, e.g. cross_entropy. |
| Optimizer | Optimizer name (e.g. adam), learning_rate, weight_decay, epsilon. |
| LR Scheduler | Optional: click the card to configure a schedule (warmup, cosine, etc.). |
| Evaluation | Metrics captured at evaluation time (e.g. capture_predictions, save_confusion). |
| Export | Output format(s): typically ONNX export with a chosen opset and dynamic-batch flag. |
Step 8: Verify the live YAML
Section titled “Step 8: Verify the live YAML”On the right side of the page, the YAML Training Configuration panel renders the train.yaml that will be submitted. As you change fields on the left, this updates in real time.
Use Edit to hand-tweak any value the UI does not expose, or Reset to go back to the canonical UI-generated config.
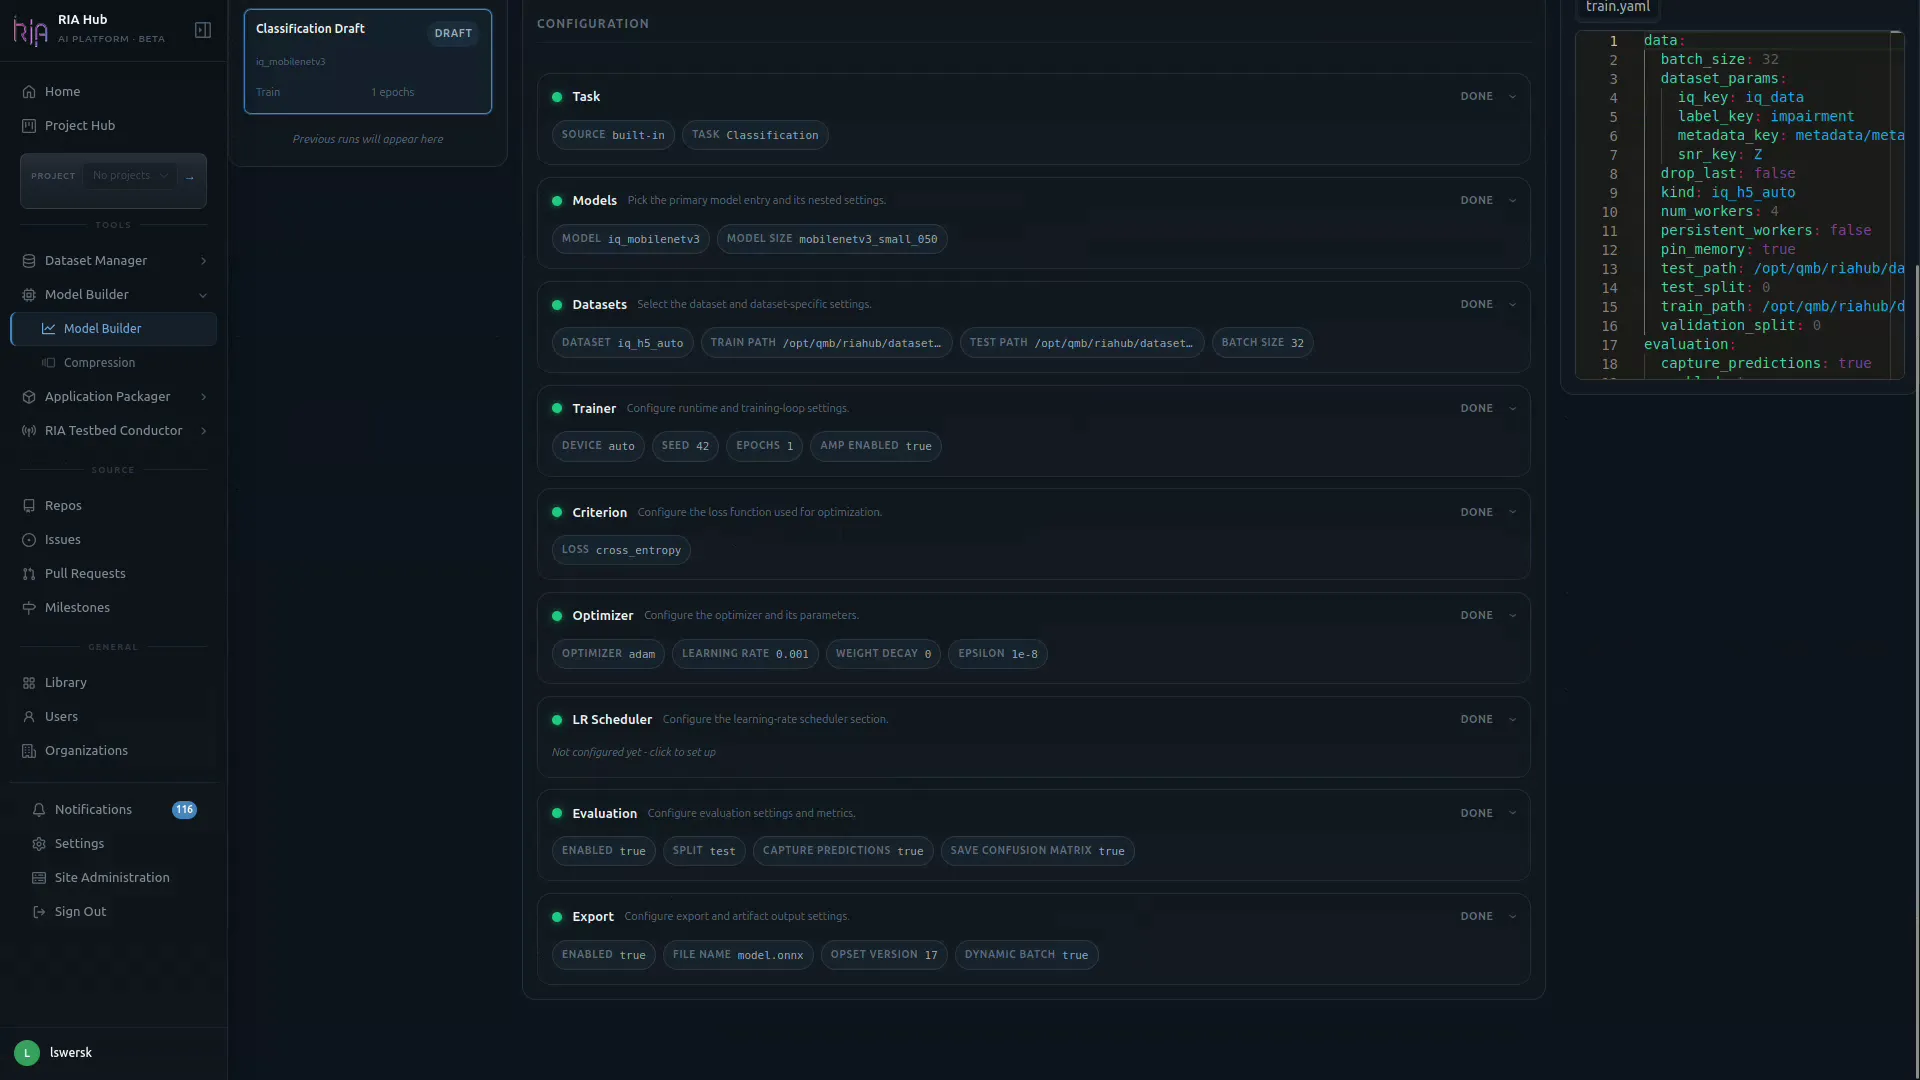
When every card shows DONE (or READY), the Progress counter in the header reaches 9 / 9 and the run is ready to submit.
Step 9: Select a runner
Section titled “Step 9: Select a runner”Click the Runner dropdown in the header (or View Available Runners) to see registered runners. Select a runner whose label matches the compute you need.
| Runner label | Hardware | Appropriate for |
|---|---|---|
cpu | CPU-only | Tutorial runs, small datasets (< 100 k slices) |
gpu-t4 | NVIDIA T4 | Medium datasets, WavesFM LP |
gpu-a100 | NVIDIA A100 | Large datasets, WavesFM LoRA, HPO sweeps |
If no runner is online, the workflow will queue and wait. Check runner status at Workflows → Management → Runners.
Step 10: Submit
Section titled “Step 10: Submit”Click Submit Run (also labelled Train) in the top-right of the header. The Model Builder:
- Posts to the backend to render the workflow and training config YAML
- Commits
.riahub/workflows/train.yamland.riahub/train_configs/train.yamlto your repository - Redirects you to the repository’s Actions tab
A Submit Model Trainer dialog appears first:
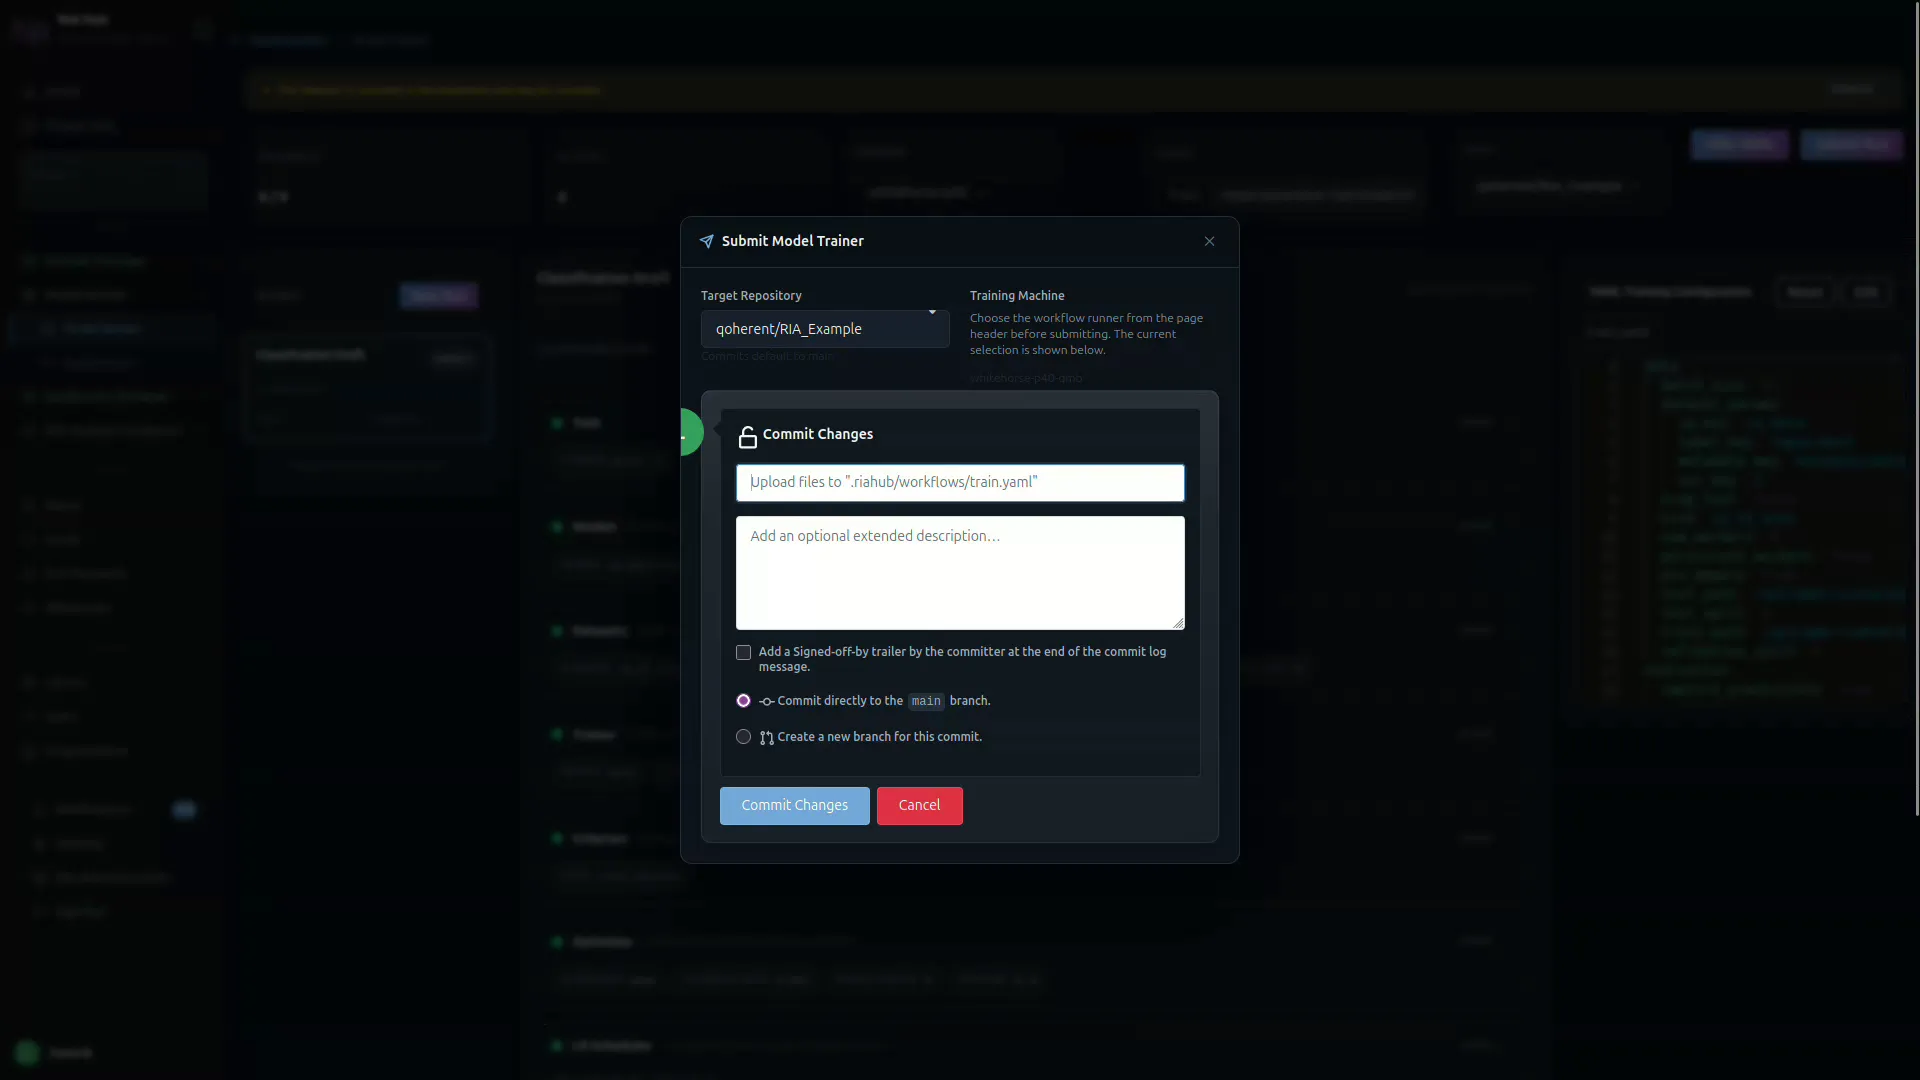
- Confirm the Target Repository and the Training Machine (runner).
- The dialog shows the upload path:
.riahub/workflows/train.yaml. - Optionally add an extended commit description.
- Choose Commit directly to
mainor Create a new branch for this commit. - Click Commit Changes.
The workflow triggers automatically on the branch push.
Step 11: Monitor the run
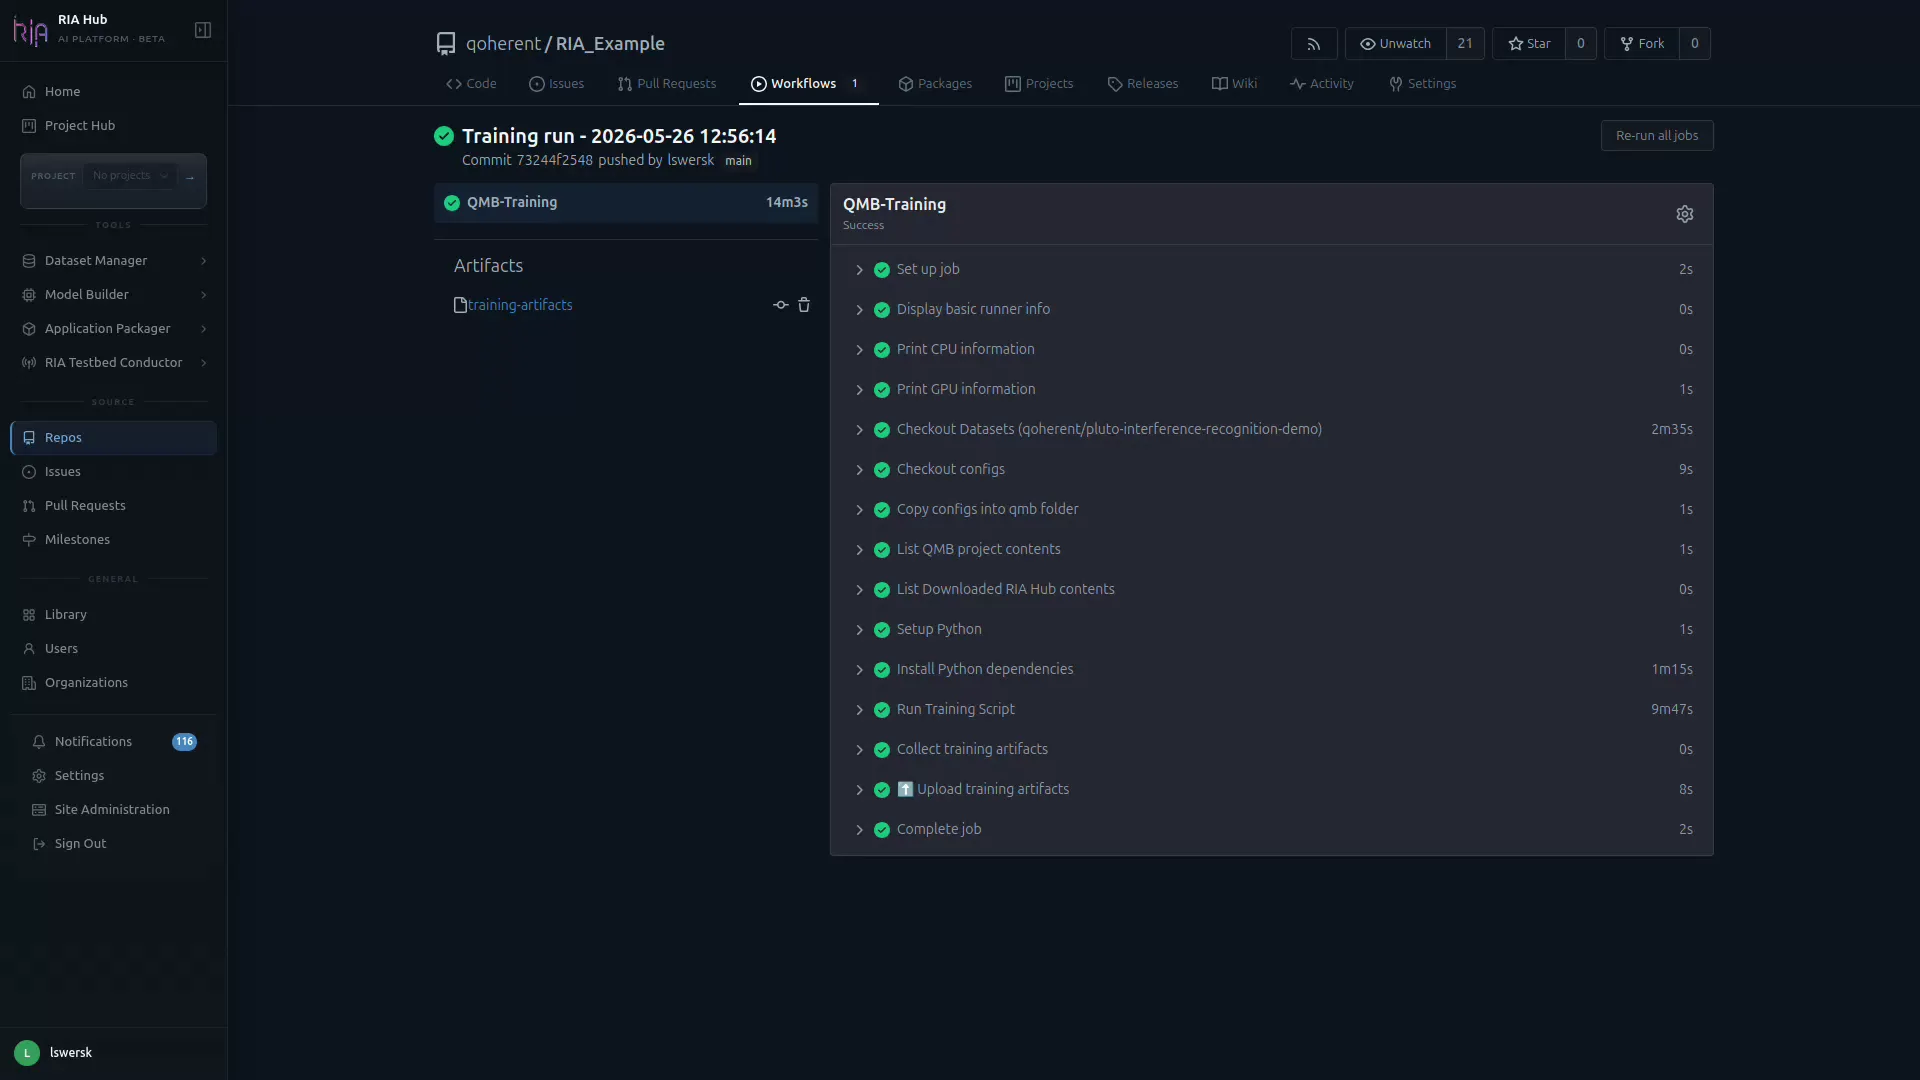
Section titled “Step 11: Monitor the run”You are redirected to the Workflows tab of your repo and the new Training run appears at the top. The right pane shows the live job steps:
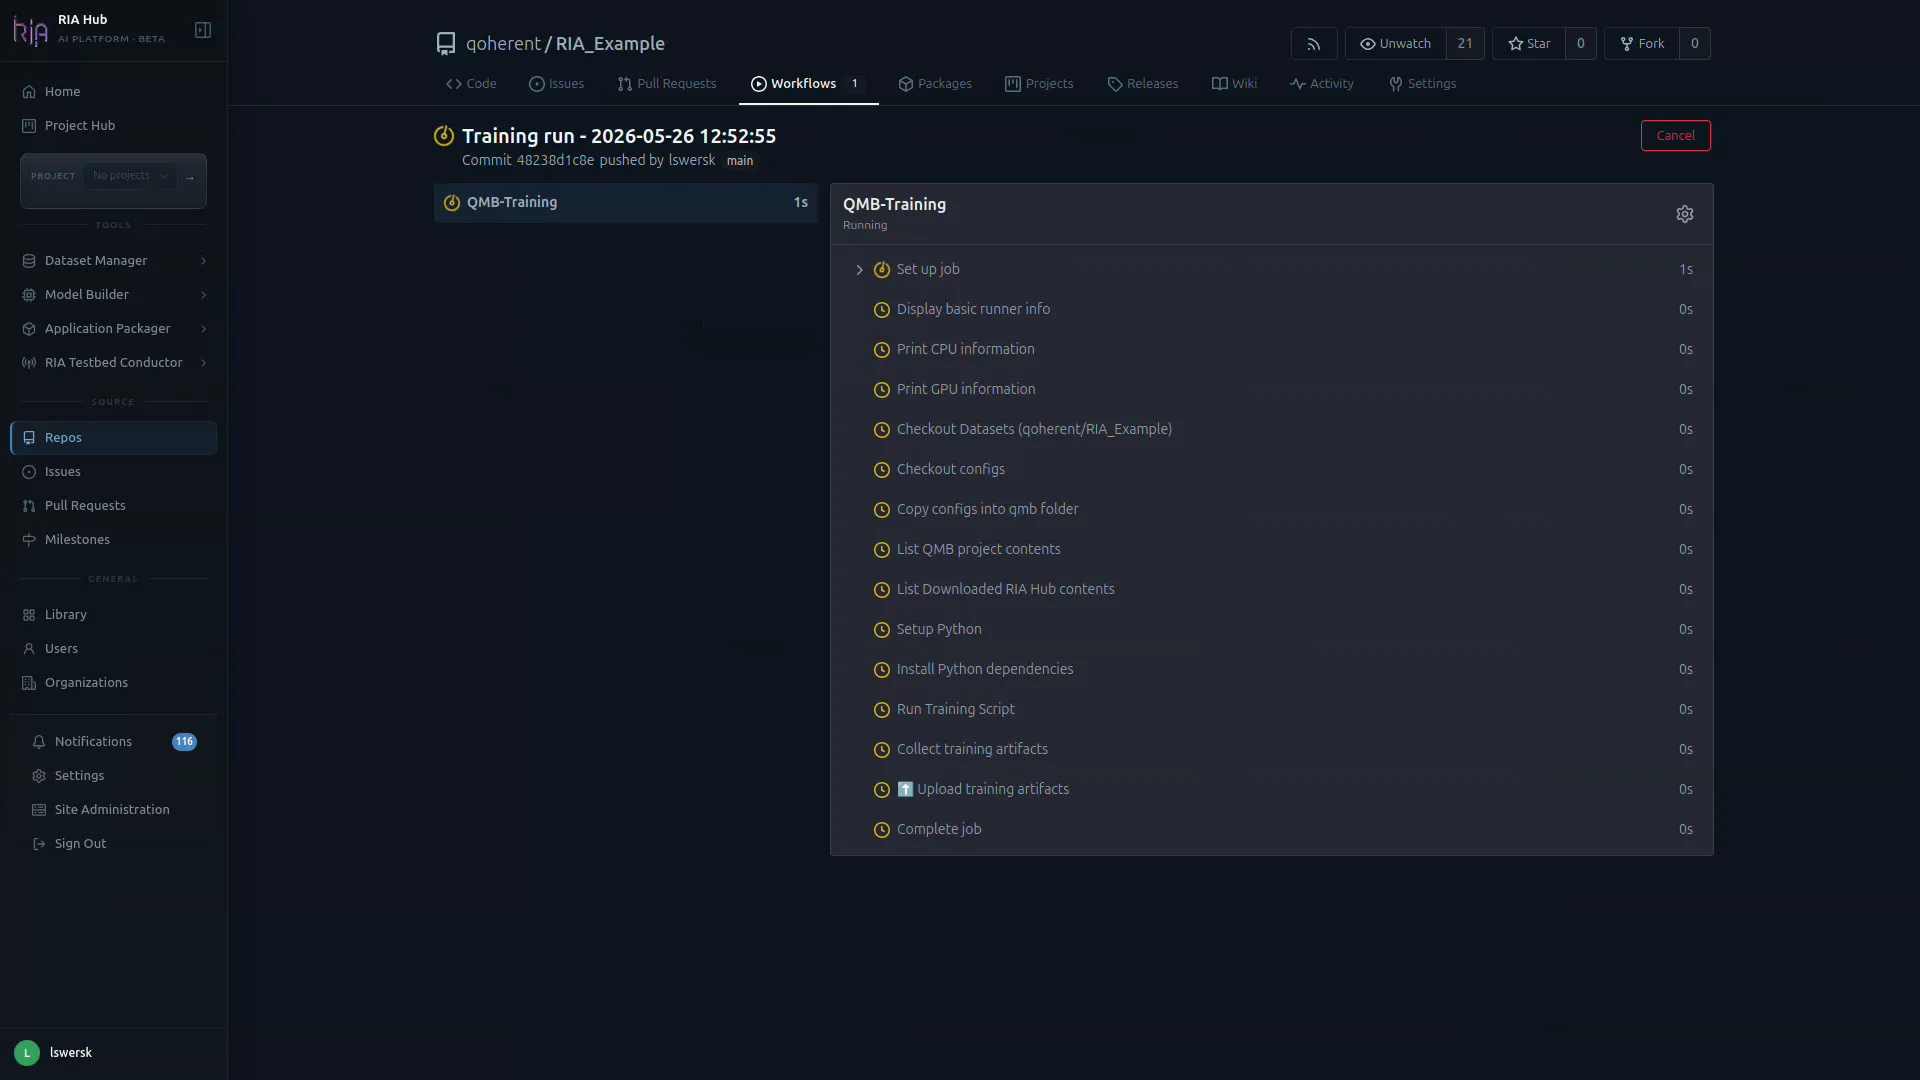
The Actions run shows one job with these steps:
| Step | What it does |
|---|---|
| Runner info | Prints OS, CPU, and GPU info |
| Download dataset | Fetches the HDF5 file from MinIO using the dataset OID |
| Checkout configs | Sparse-checks out .riahub/train_configs/ |
| QMB Training | Runs qmb train --config-path .riahub/train_configs/train.yaml |
| Collect training artifacts | Gathers best.pt, *.onnx, and optional PNG outputs |
| Upload training artifacts | Uploads a training-artifacts zip to Actions artifact storage |
Click any step to expand its live log.
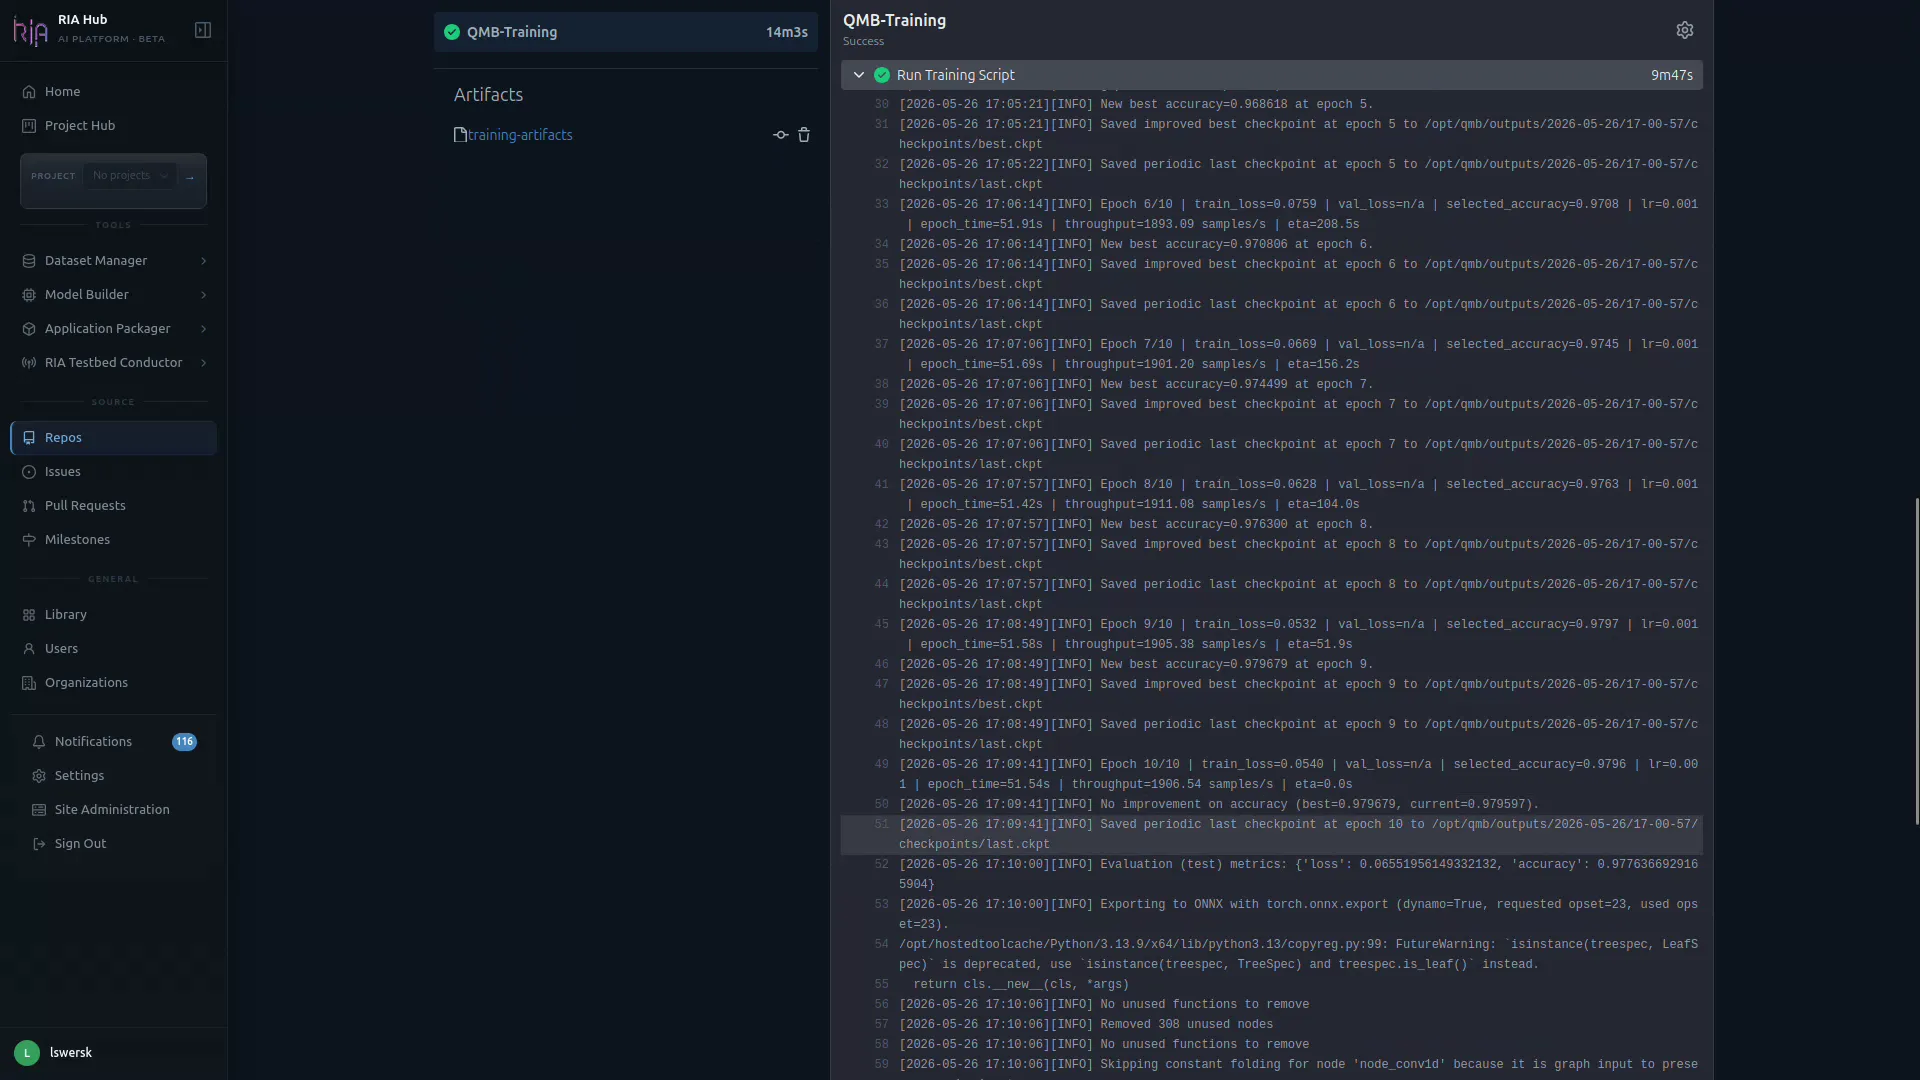
Training logs appear in the QMB Training step in real time. Expect output like:
Epoch 1/20: train_loss: 0.9842 val_loss: 0.9511 val_accuracy: 0.6421Epoch 2/20: train_loss: 0.7213 val_loss: 0.6901 val_accuracy: 0.7834…Epoch 20/20: train_loss: 0.1021 val_loss: 0.0988 val_accuracy: 0.9876Best val accuracy: 0.9901 (epoch 19)When the workflow finishes, the header turns green and the Artifacts panel lists the produced bundle (e.g. training-artifacts).
From here you can also Re-run all jobs: useful for re-running on a different runner without changing config.
Step 12: Download and publish artifacts
Section titled “Step 12: Download and publish artifacts”Training artifacts are stored in Gitea Actions artifact storage, not pushed back to the Library automatically.
When the run finishes:
- On the Actions run page, click training-artifacts under Artifacts.
- Extract the zip: you will find
best.pt,best.onnx, and optionallyconfusion_matrix.png.
To register the model in your repository’s Library, you can use either the Git LFS CLI or the RIA Hub web UI.
Option A: Git LFS from the terminal
Section titled “Option A: Git LFS from the terminal”git lfs track "*.pt" "*.onnx"git add .gitattributes
mkdir -p models/cp /path/to/best.onnx models/modrec-tutorial-v1.onnxcp /path/to/best.pt models/modrec-tutorial-v1.pt
git add models/git commit -m "add trained modrec model v1"git pushOption B: Upload via the web UI
Section titled “Option B: Upload via the web UI”-
In your repository, click Add a file → Upload file.
-
Drop the artifacts produced by the run (
confusion_matrix.png,model.onnx,model.ckpt). -
RIA Hub recognises large binary types and offers Track with Git LFS for
.png,.onnx, and.ckpt. Tick each box.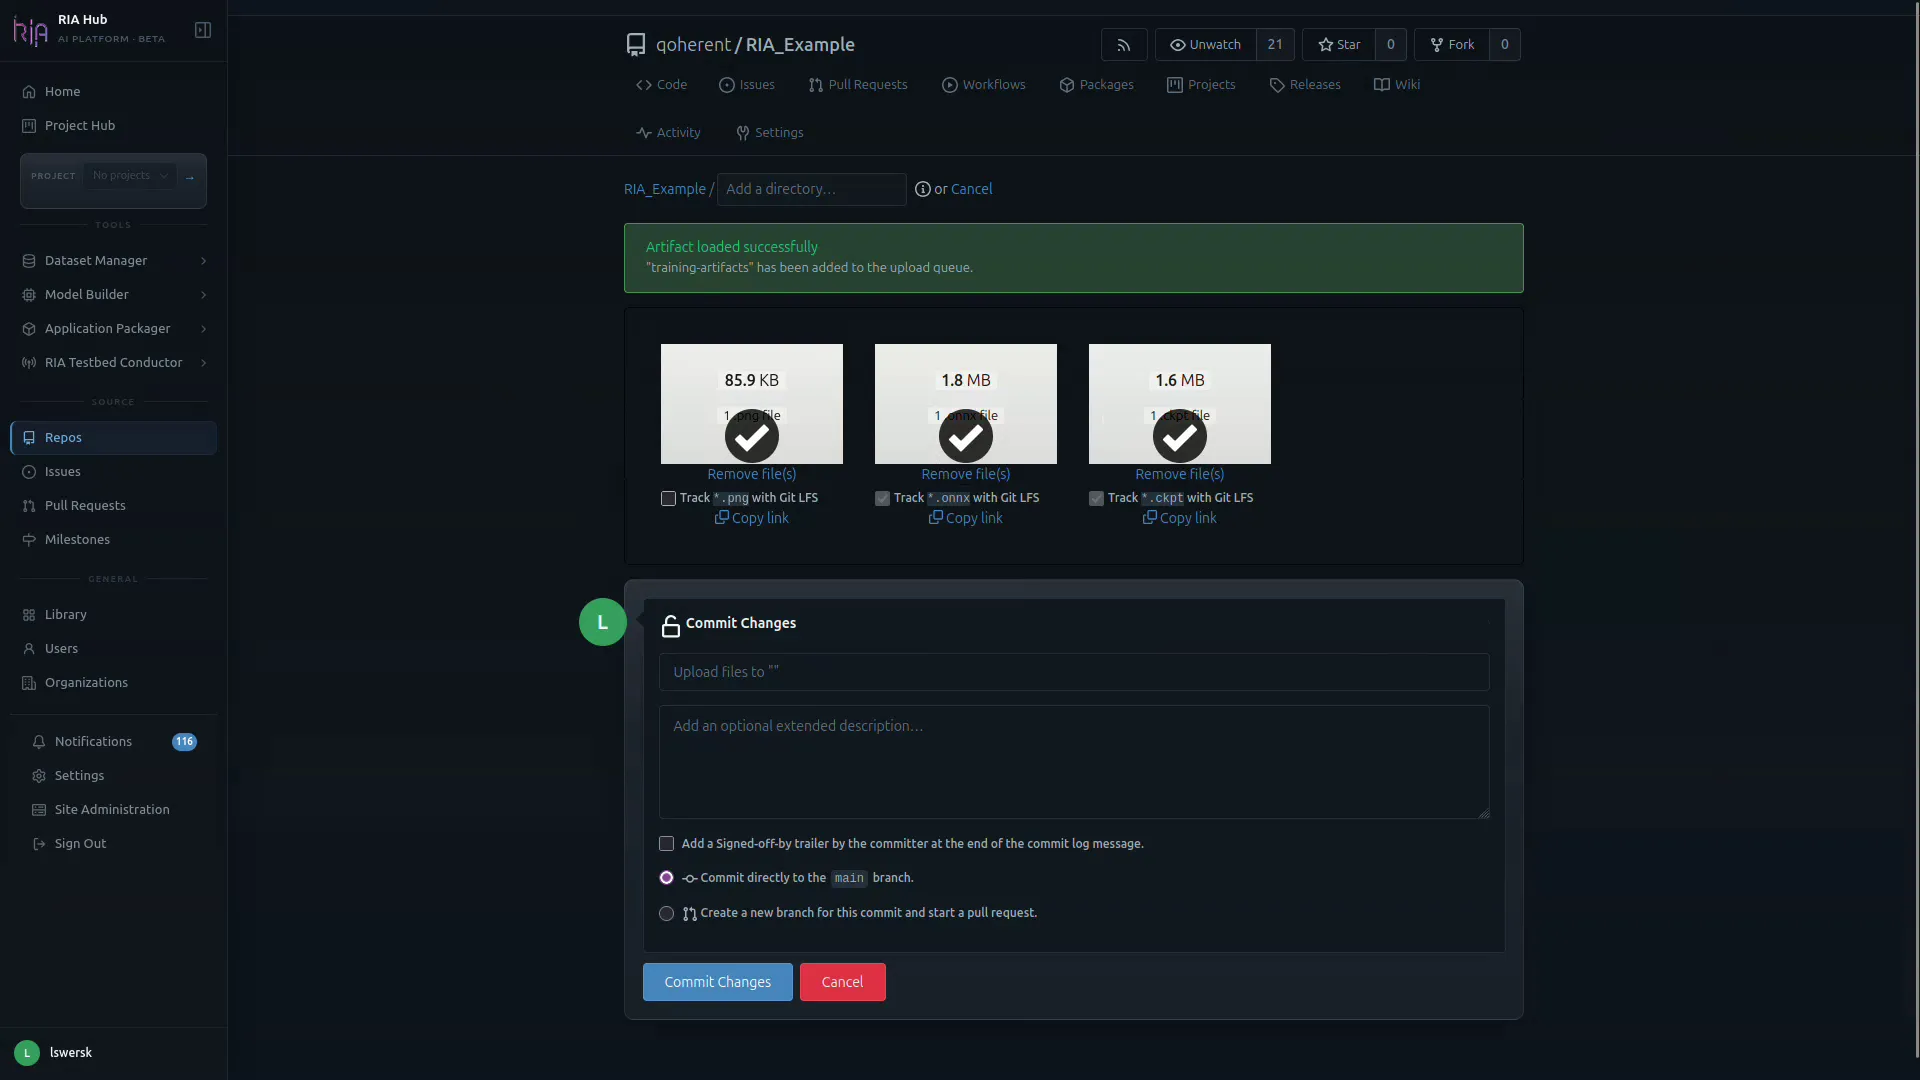
-
A fourth tile,
.gitattributes, is added automatically to record the LFS patterns.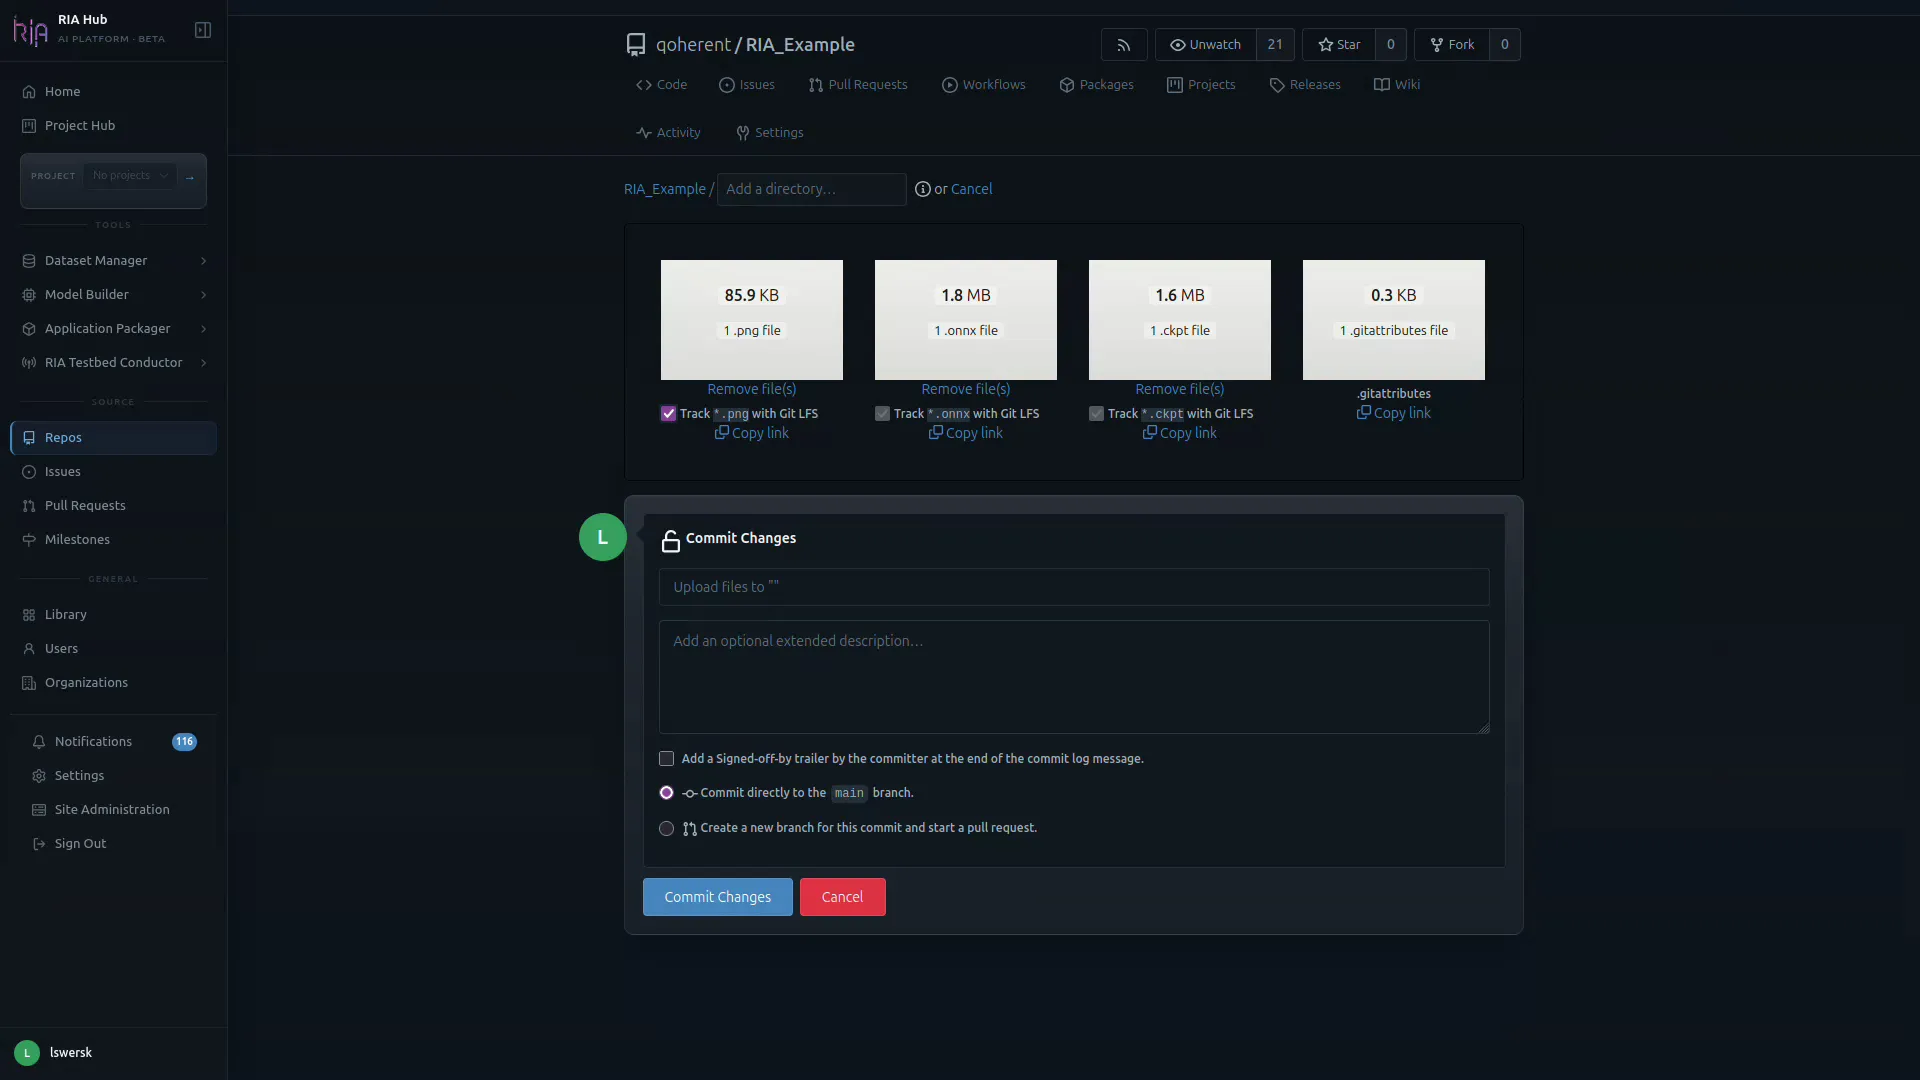
-
Commit the changes: directly to
mainor via a pull request.
The files now show up in the repo file listing alongside your code and dataset:
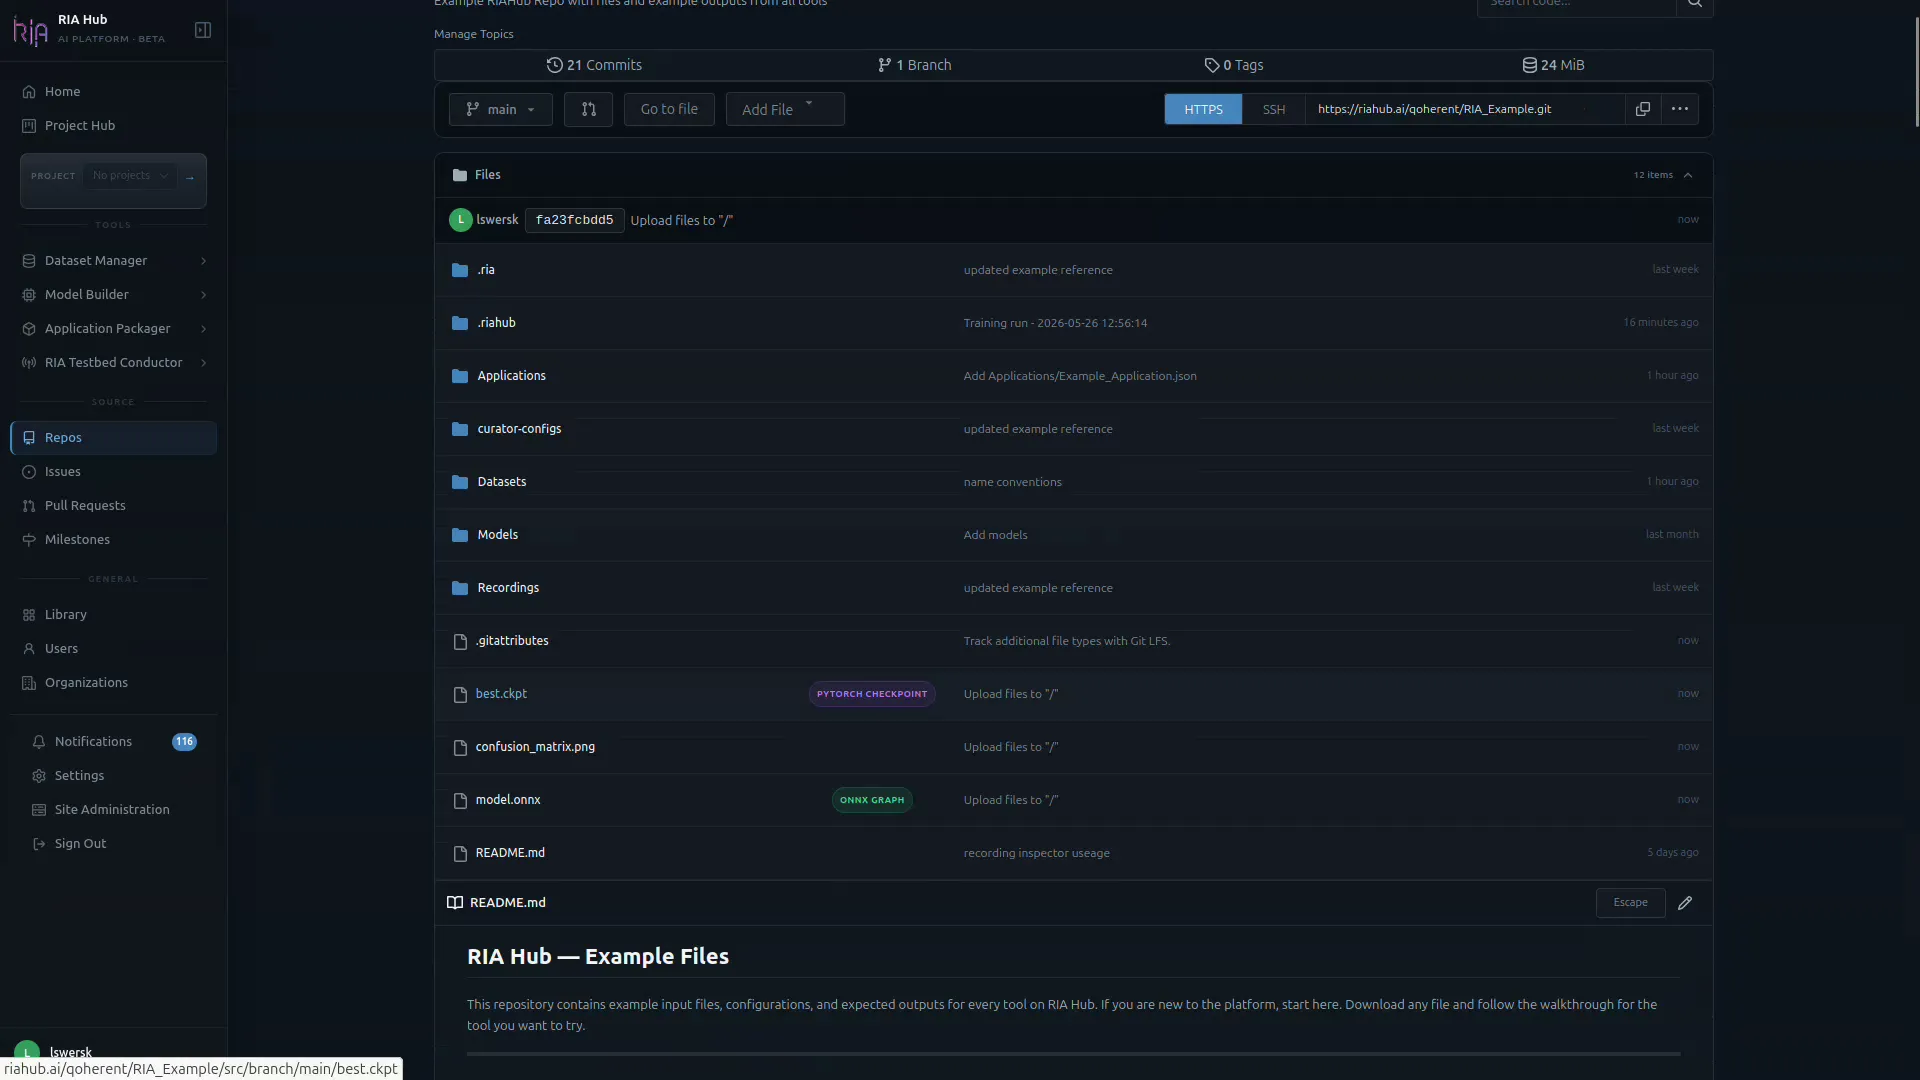
RIA Hub picks up the new files on push and registers them in the Library:
modrec-tutorial-v1.pt→pytorch_checkpointassetmodrec-tutorial-v1.onnx→onnx_graphasset
Step 13: Inspect the evaluation output
Section titled “Step 13: Inspect the evaluation output”Open confusion_matrix.png in the repo to confirm the model trained successfully:
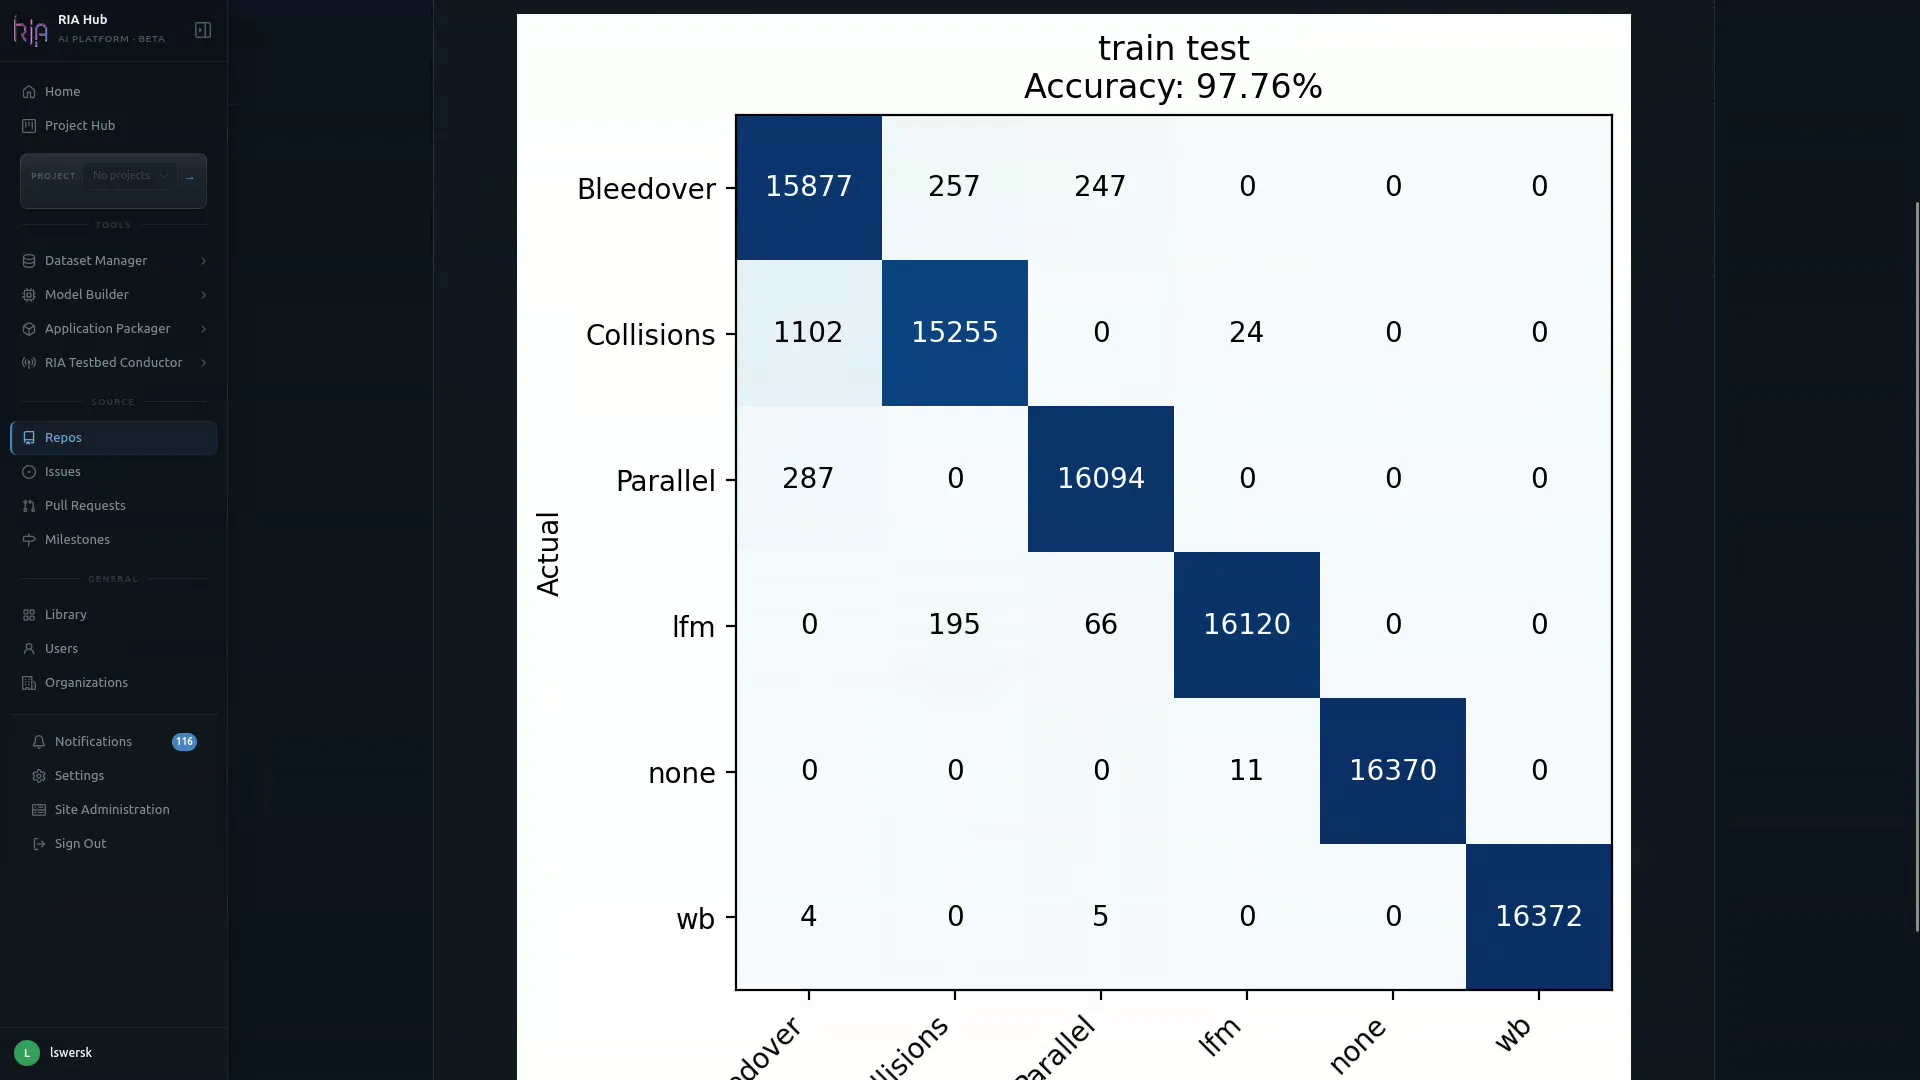
If accuracy looks good, the .onnx artifact is ready to flow into:
- Model Builder → Compression to prune/quantise for edge deployment.
- Application Packager to bundle into a deployable application.
- RIA Testbed Conductor to run on real radio hardware.
Troubleshooting
Section titled “Troubleshooting”The workflow does not trigger after submit
Section titled “The workflow does not trigger after submit”The workflow file has an on.push.branches trigger for the branch the Model Builder targeted. If you push to a different branch, the workflow will not fire. Check that the branch name in .riahub/workflows/train.yaml matches the branch you are on.
Dataset not found (download step fails)
Section titled “Dataset not found (download step fails)”The RIAHUB_BASE_URL variable must be set so the runner can build the MinIO download URL. Set it under Settings → Variables → Actions in your repository, value https://riahub.ai (or your instance URL).
Out of memory
Section titled “Out of memory”Reduce batch size in the Model Builder form and re-submit, or switch to a larger runner.
Model accuracy is poor (< 60 % on modulation recognition)
Section titled “Model accuracy is poor (< 60 % on modulation recognition)”Check these in order:
1. **Class balance**: use the [Inspector](/guides/dataset-manager/inspector/) Balance view; unequal class counts hurt accuracy2. **Label consistency**: use the Sample view to confirm slices visually match their labels3. **Epochs**: try 30–50 epochs; 20 may not converge on small datasets4. **SNR**: if synthetic recordings use very high noise power, signals become indistinguishable; re-generate with lower `--noise-power`A section stays ACTIVE instead of DONE
Section titled “A section stays ACTIVE instead of DONE”Open the card; one required field is empty or invalid. The YAML panel on the right also highlights the missing key.
The Repo dropdown is empty
Section titled “The Repo dropdown is empty”You do not have push access to any repos under the current project. Switch projects or request access.
The Runner dropdown is empty
Section titled “The Runner dropdown is empty”No runner is registered for the selected repo. Register one via Settings → Actions → Runners on the repo or organisation.
Switching to HPO mode
Section titled “Switching to HPO mode”Change Mode in the header to Hyperparameter Optimization. Extra columns (sweep ranges, search space) appear on each relevant section. HPO is currently in beta.
Editing YAML directly
Section titled “Editing YAML directly”Use the Edit button on the YAML panel for anything not exposed in the UI. The UI will not overwrite custom keys it does not recognise.
Next steps
Section titled “Next steps”- Hyperparameter optimisation: open Model Builder → HPO to run an Optuna sweep across learning rate, batch size, and architecture variants
- Edge deployment: take the
best.onnxto the Application Packager to build a Holoscan inference application and deploy it to a registered Screens agent - Example files: The RIA_Example repository includes a pre-curated
Datasets/example_radio_dataset.h5and example.ckpt/.onnxmodel files, and a ready-to-adapttrain.yamlworkflow.